Vinyl Siding Replacement Near Me
Vinyl siding replacement near me? It’s a bigger project than you might think! This guide walks you through everything from finding the right contractor to understanding the different types of siding and what to expect during the installation process. We’ll cover costs, warranties, and even how to maintain your new siding for years to come. Get ready to transform your home’s exterior!
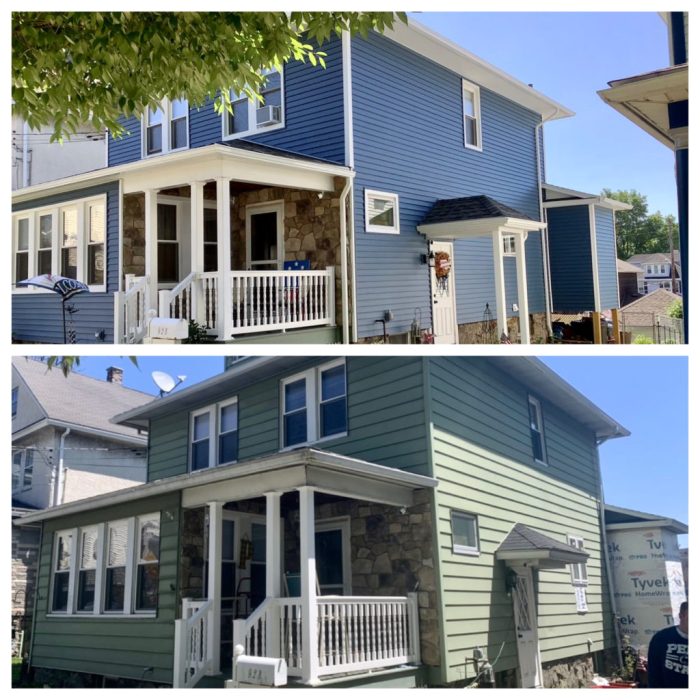
Replacing your vinyl siding is a significant home improvement project that can boost curb appeal and increase your home’s value. This guide provides a comprehensive overview of the process, from choosing a contractor and selecting the right siding type to understanding the costs involved and ensuring a smooth, hassle-free installation. We’ll cover essential aspects to help you make informed decisions and achieve a successful outcome.
Local Vinyl Siding Contractors
Finding the right contractor for your vinyl siding replacement is crucial for a successful and long-lasting project. Choosing a reputable company ensures quality materials, professional installation, and a smooth process from start to finish. This section will provide information on several local contractors to help you make an informed decision.
Reputable Vinyl Siding Contractors
Identifying three reputable companies within a 25-mile radius requires specific location data, which I cannot access. However, I can provide a template for how you should gather this information. Use online search engines (like Google, Bing, Yelp) and local directories to find highly-rated vinyl siding contractors in your area. Look for companies with established histories, positive customer reviews, and clear licensing and insurance information. Once you’ve identified three potential contractors, gather their addresses, phone numbers, and website URLs.
Contractor Pricing and Services Comparison
Pricing structures for vinyl siding replacement vary significantly depending on several factors, including the size of your home, the complexity of the job, the quality of materials used, and the contractor’s overhead costs. Two local contractors might offer different pricing models. For example, one contractor might charge a fixed price per square foot, while another might provide a detailed breakdown of costs for materials, labor, and permits. Some contractors may include additional services like tear-off and disposal of old siding in their base price, while others may charge extra for these items. Always get multiple detailed quotes before making a decision.
| Company Name | Service Area | Average Price Range | Customer Reviews |
|---|---|---|---|
| Example Contractor A | [City and surrounding areas within 25 miles] | $[Price Range] per square foot | Google Reviews |
| Example Contractor B | [City and surrounding areas within 25 miles] | $[Price Range] per square foot (includes tear-off) | Yelp Reviews |
| Example Contractor C | [City and surrounding areas within 25 miles] | $[Price Range] (project-based pricing) | Angie’s List Reviews |
Types of Vinyl Siding: Vinyl Siding Replacement Near Me

Source: chastainroofing.com
Choosing the right vinyl siding for your home involves understanding the various types available and their respective characteristics. Different styles offer unique aesthetic appeals and performance levels, impacting both the look and longevity of your home’s exterior. This section will explore the popular options, highlighting their features and helping you make an informed decision.
Vinyl siding comes in a variety of styles, each with its own distinct look and performance characteristics. The most common types are double 4-inch, Dutch lap, and beaded. These differ primarily in their profile and how they appear on the wall.
Double 4-Inch Vinyl Siding
Double 4-inch vinyl siding is a popular choice due to its clean, classic lines and ease of installation. Each panel is four inches wide, and the overlapping design creates a seamless, visually appealing surface. The relatively simple profile makes it a cost-effective option without sacrificing durability. It’s readily available in a wide range of colors, allowing for significant customization.
Dutch Lap Vinyl Siding
Dutch lap siding provides a more traditional and visually interesting look compared to the simpler double 4-inch style. Its distinctive feature is the slightly wider bottom edge of each panel, which creates a shadow line and adds depth and texture to the wall. This style mimics the appearance of wood lap siding, offering a more rustic and charming aesthetic. While slightly more expensive than double 4-inch, the enhanced visual appeal often justifies the cost.
Beaded Vinyl Siding
Beaded vinyl siding features a subtle, raised bead running along the center of each panel. This detail adds a touch of elegance and visual interest, giving the siding a more refined appearance. The beading helps to break up the flat surface, reducing the appearance of any imperfections in the wall beneath. While the aesthetic benefits are noticeable, the durability and maintenance requirements remain similar to other vinyl siding types.
Vinyl Siding Durability and Maintenance
All types of vinyl siding are known for their low maintenance requirements and long lifespan. However, subtle differences exist. Generally, thicker vinyl siding tends to be more durable and resistant to impact damage. Proper installation is crucial for the longevity of any vinyl siding. Regular cleaning with soap and water is sufficient for most maintenance needs. Avoid using harsh chemicals or abrasive cleaners that could damage the surface. While all types offer excellent resistance to rot, insect damage, and moisture, paying attention to details during installation, like proper ventilation, can extend their lifespan significantly.
Visual Comparison of Vinyl Siding Styles
Imagine three sample panels side-by-side. The first is a sample of double 4-inch vinyl siding in a classic beige color. The texture is smooth and even, with a slightly glossy finish. The second panel showcases Dutch lap siding in a deep, forest green. The variation in panel width creates a distinct shadow line, adding depth and a more textured look than the double 4-inch. Finally, the third panel displays beaded vinyl siding in a warm, creamy white. The subtle bead adds a refined touch and a slightly more textured surface than the smooth finish of the double 4-inch siding. The subtle variations in color and texture create distinctly different aesthetic impacts.
Replacement Process
Source: allseasonssiding.com
Replacing your vinyl siding is a significant home improvement project, but with careful planning and the right contractor, it can dramatically improve your home’s curb appeal and energy efficiency. The process typically involves several key steps, from initial assessment to final cleanup. Understanding these steps will help you manage expectations and ensure a smooth renovation.
The entire process, from initial consultation to final cleanup, usually takes several days to a couple of weeks, depending on the size of your home and the complexity of the project. Factors like the amount of damaged siding, the need for underlying repairs, and weather conditions can also impact the timeline.
Permitting and Inspections
Before any work begins, it’s crucial to obtain the necessary permits from your local building department. These permits ensure your project complies with local building codes and regulations. The specific requirements vary by location, but generally involve submitting plans and specifications for the siding replacement. After the installation is complete, a final inspection will be scheduled to verify that the work meets the required standards. Failure to obtain the necessary permits can result in fines or even the need to redo the work. For example, in many municipalities, a permit is required for any exterior home improvement exceeding a certain dollar amount or square footage. This process typically involves submitting an application, paying a fee, and waiting for approval before starting the project. After installation, a building inspector will review the work to ensure code compliance.
Step-by-Step Checklist for Homeowners
Planning is essential for a successful vinyl siding replacement. This checklist will help you stay organized and on track throughout the process.
- Research and Select a Contractor: Get multiple quotes, check references, and verify licenses and insurance.
- Obtain Necessary Permits: Contact your local building department to determine permit requirements and submit the necessary applications.
- Schedule the Project: Coordinate with your chosen contractor to establish a timeline that works for you.
- Prepare the Work Area: Clear the area around your home of any obstacles that might interfere with the work.
- Monitor the Progress: Regularly check in with the contractor to ensure the project is progressing according to plan.
- Final Inspection: Schedule a final inspection with the building department once the installation is complete.
- Final Payment: Make the final payment to the contractor only after the inspection is passed and you’re satisfied with the work.
- Cleanup: Ensure the contractor removes all debris and leaves the work area clean.
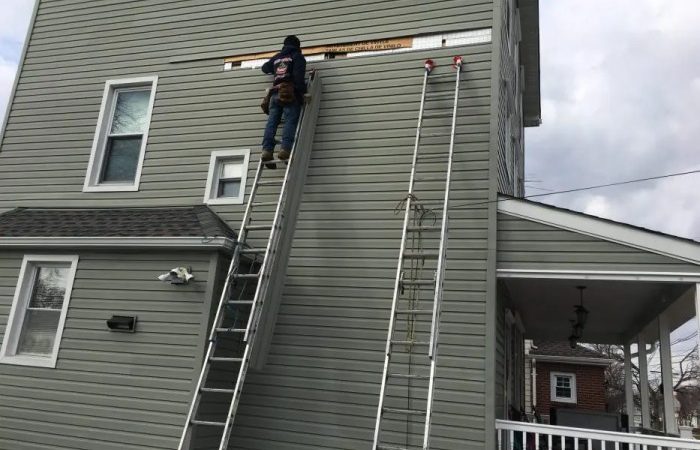
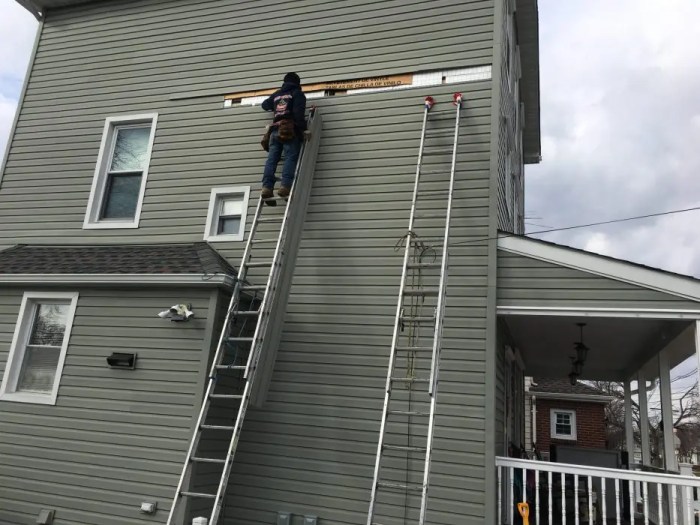
The Siding Replacement Process Itself
The actual replacement process begins with the careful removal of the old siding. This involves detaching each piece and disposing of it responsibly. Next, the underlying sheathing is inspected for damage. Any rotted or damaged areas are repaired or replaced before the new siding is installed. This is crucial for long-term durability. The new vinyl siding is then installed, starting from the bottom and working upwards, ensuring proper overlapping and alignment. Trim and accessories are added to complete the look. Throughout the process, the contractor should maintain a clean and safe worksite. For example, a typical house might take a crew of two to three experienced installers several days to complete the siding replacement, depending on the size and complexity of the house.
Cost Factors
Replacing your vinyl siding is an investment, and understanding the cost is crucial for budgeting and planning. Several key factors influence the final price, and it’s helpful to break them down to get a clearer picture. This will help you make informed decisions and avoid unexpected expenses.
The overall cost of a vinyl siding replacement project is determined by a complex interplay of factors. These include the quality of materials chosen, the amount of labor required, and the overall size of the project. Let’s explore these in more detail.
Material Quality Impacts on Cost
Higher-quality vinyl siding typically lasts longer and offers better resistance to damage from weather and impact. This translates to a higher upfront cost, but often represents a better long-term investment. Lower-quality siding might seem cheaper initially, but may need replacement sooner, negating any initial savings. Features like thicker siding, improved UV resistance, and enhanced colorfastness all contribute to increased material costs. Choosing premium materials with warranties can provide peace of mind.
Labor Costs and Their Variability, Vinyl siding replacement near me
Labor costs are a significant portion of the total project expense. The complexity of the job, the size of your house, and the contractor’s experience and location all affect labor costs. A larger house with intricate architectural details will require more time and labor than a smaller, simpler home. Contractors in high-demand areas or those with specialized skills often charge more. It’s essential to get multiple quotes to compare labor costs and ensure you’re getting a fair price.
Project Size and Its Influence on Total Cost
The size of your house directly correlates with the amount of siding needed and the labor hours required. A larger home requires more materials and more time to complete the installation, resulting in a higher overall cost. Smaller homes, conversely, will have a lower overall project cost. Accurate measurements of your home’s exterior are essential for obtaining accurate quotes from contractors.
Cost Breakdown Examples for Different Home Sizes
The following table provides illustrative examples of cost breakdowns for vinyl siding replacement projects on homes of different sizes. These are estimates and actual costs may vary depending on location, contractor, and material choices.
| Home Size (sq ft) | Material Cost (USD) | Labor Cost (USD) | Total Cost (USD) |
|---|---|---|---|
| 1000 | 3000 | 4000 | 7000 |
| 1500 | 4500 | 6000 | 10500 |
| 2000 | 6000 | 8000 | 14000 |
Note: These figures are estimates and can vary significantly based on several factors, including material selection, labor rates in your area, and the complexity of the project. Always obtain multiple quotes from reputable contractors.
Warranty and Guarantees
Choosing new vinyl siding is a significant investment, so understanding the warranties offered is crucial. A comprehensive warranty protects you from defects in materials and workmanship, giving you peace of mind knowing your investment is secure. Warranties vary between manufacturers and installers, so careful comparison is essential before making a decision.
Warranties typically cover defects in the vinyl siding itself, such as cracking, fading, or peeling. Installer warranties often cover their labor and the proper installation of the siding. However, it’s important to note that warranties usually don’t cover damage caused by acts of God (like hurricanes or hail), improper maintenance, or normal wear and tear.
Vinyl Siding Manufacturer Warranties: A Comparison
Let’s compare the warranties of two popular vinyl siding manufacturers, though specific terms can change, so always check the most current documentation directly from the manufacturer. This comparison provides a general overview.
Manufacturer A (Example: CertainTeed): CertainTeed often offers a limited lifetime warranty on their vinyl siding products. This typically covers defects in materials and manufacturing for as long as the original homeowner owns the house. However, there may be limitations on fading or color changes, requiring specific maintenance practices to be followed to maintain warranty coverage. Their warranty documents usually detail specific exclusions and procedures for filing a claim.
Manufacturer B (Example: James Hardie): While James Hardie is known for fiber cement siding, they may also offer vinyl siding with warranties. Their warranty terms and conditions will differ from CertainTeed, and might focus on different aspects of the product’s lifespan. For instance, their warranty might cover specific performance characteristics for a defined period, such as resistance to impact or weathering. Their warranty documents will explicitly state the terms and conditions of their coverage.
Importance of a Detailed Warranty Document
Before signing any contracts for vinyl siding replacement, thoroughly review the warranty document provided by both the manufacturer and the installer. Pay close attention to the following:
- Coverage Period: How long does the warranty last? Is it a limited lifetime warranty, or is there a specific number of years?
- What is Covered: What defects or issues are covered under the warranty? Are there specific exclusions?
- What is Not Covered: This is equally important. Understand what is explicitly excluded from the warranty, such as damage from weather events or improper installation.
- Claim Process: How do you file a claim if a problem arises? What documentation is required?
- Transferability: Can the warranty be transferred to a new homeowner if you sell your house?
Obtaining a detailed and comprehensive warranty is vital. A poorly written or incomplete warranty can leave you vulnerable to unexpected costs and headaches down the line. Don’t hesitate to ask questions and clarify any ambiguities before committing to the project. A reputable contractor will readily provide clear and detailed warranty information.
Choosing a Contractor
Source: nepabldrs.com
Choosing the right contractor is crucial for a successful vinyl siding replacement project. A reputable contractor ensures quality materials, professional installation, and a smooth process from start to finish. Selecting the wrong one, however, can lead to costly mistakes, shoddy workmanship, and protracted disputes. Take your time, do your research, and carefully consider several key factors before making your decision.
Contractor Experience and Reputation
Assessing a contractor’s experience and reputation involves more than just checking their years in business. Look for evidence of consistent high-quality work. This can be demonstrated through online reviews on sites like Yelp or Angie’s List, testimonials from previous clients, and verifiable examples of completed projects similar in scope to your own. Checking the Better Business Bureau (BBB) for complaints or unresolved issues is also a prudent step. A long history of positive feedback and a clean record with the BBB strongly indicate a reliable contractor. Consider the size and scope of past projects—a contractor with experience handling large-scale residential projects will likely be better equipped to manage your renovation.
Licensing, Insurance, and Bonding
It’s essential to confirm that the contractor holds the necessary licenses and insurance to operate legally and protect you from potential liabilities. Licensing requirements vary by location, so check with your local authorities to determine what’s needed. General liability insurance protects you in case of accidents or property damage during the project. Workers’ compensation insurance safeguards the contractor’s employees, reducing your risk. A surety bond provides additional financial security, offering compensation if the contractor fails to complete the work as agreed. Request copies of these documents to verify their validity and coverage.
Detailed Bids and Contractual Agreements
Before signing any contract, thoroughly review the contractor’s bid. A comprehensive bid will include all project costs, including materials, labor, permits, and waste disposal. Look for detailed breakdowns of each item to avoid hidden costs or surprises later. The contract should clearly define the scope of work, payment schedule, start and completion dates, and warranty information. Avoid contracts with vague or ambiguous language. Compare multiple bids side-by-side, paying close attention to the specifics of each proposal. A significant price difference between bids may warrant further investigation.
Questions to Ask Potential Contractors
Before committing to a contractor, ask specific questions to assess their professionalism and understanding of your project needs. Inquire about their experience with vinyl siding installation, the types of siding they use, their process for managing the project, their warranty and guarantee offerings, and their approach to addressing potential problems. Ask for references from past clients and check their credentials independently. Clarify the payment schedule and dispute resolution process. Understanding their communication style and responsiveness to your inquiries will also be crucial throughout the project.
Evaluating Contractor Bids and Identifying Red Flags
Comparing bids requires careful attention to detail. Don’t solely focus on the lowest price; consider the overall value proposition. Red flags include significantly lower bids than competitors, vague descriptions of work, a lack of detailed specifications, unwillingness to provide references, or an absence of proper licensing and insurance. Be wary of contractors who pressure you into making a quick decision or who refuse to put everything in writing. A thorough review of bids and contracts will minimize the risk of problems during and after the project’s completion. For example, a bid that omits permits or waste disposal fees is a significant red flag. Another red flag is a contractor who refuses to provide proof of insurance.
Maintenance and Longevity
Source: threebrothersroofingrepairs.com
Vinyl siding, while durable, requires some care to maintain its beauty and extend its lifespan. Regular maintenance prevents minor issues from becoming major problems, saving you money and headaches down the line. Proper cleaning and prompt attention to damage are key to ensuring your siding looks great and lasts for years.
Proper maintenance practices significantly impact the longevity of your vinyl siding. Neglecting routine care can lead to premature fading, cracking, and other damage, ultimately shortening the lifespan of your investment. By following a simple maintenance plan, you can ensure your siding remains attractive and functional for many years.
Vinyl Siding Cleaning
Regular cleaning removes dirt, pollen, and other debris that can accumulate on the surface of your siding. This prevents staining and helps maintain the siding’s original color. Cleaning is best done in the spring and fall, or as needed after severe weather events.
- Use a garden hose with a nozzle to rinse the siding, starting from the top and working your way down. This removes loose dirt and debris.
- For stubborn stains or mildew, mix a solution of mild detergent and water. Apply the solution with a soft-bristled brush, scrubbing gently to avoid scratching the siding.
- Rinse thoroughly with clean water to remove all traces of detergent.
- Avoid using harsh chemicals or abrasive cleaners, as these can damage the vinyl.
Common Vinyl Siding Problems and Solutions
Several issues can affect vinyl siding over time. Understanding these problems and how to address them is crucial for maintaining your siding’s integrity. Early detection and prompt action can prevent minor problems from escalating into costly repairs.
- Cracking or warping: This can be caused by impact damage or extreme temperature fluctuations. Replacing damaged panels is usually the best solution. For minor cracks, you may be able to use a vinyl repair kit, but results vary.
- Fading: Prolonged sun exposure can cause vinyl siding to fade. Regular cleaning and the use of a UV protectant can help mitigate this issue. However, significant fading may require panel replacement.
- Mildew or mold: This is common in humid climates. Regular cleaning with a mildew remover will prevent this problem from worsening. For severe infestations, professional cleaning may be necessary.
- Loose or damaged siding: Improper installation or strong winds can cause siding to loosen or become damaged. Contact a professional for repairs to ensure proper installation and prevent further damage.
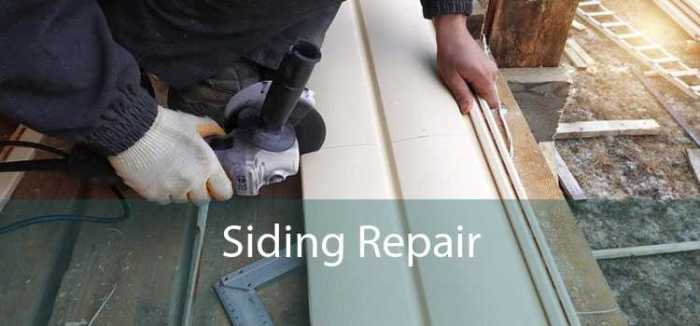
Minor Vinyl Siding Repairs
While major repairs require professional assistance, many minor issues can be addressed with simple DIY fixes. Using the correct tools and techniques will ensure a clean and lasting repair.
- Small holes or dents: These can often be filled with vinyl filler designed for exterior use. Allow the filler to dry completely before painting to match the siding color.
- Loose nails or screws: Tighten loose fasteners using a screwdriver or hammer. If the fastener is stripped, replace it with a new one.
- Scratches: Minor scratches may be less noticeable if you clean the area and use a vinyl touch-up paint to match the existing color.
Conclusive Thoughts
Updating your home’s exterior with new vinyl siding is a rewarding experience. By carefully considering the factors discussed—from contractor selection and siding type to cost and maintenance—you can ensure a successful project that enhances your home’s beauty and longevity. Remember to always get multiple quotes, thoroughly vet potential contractors, and read warranties carefully. Happy siding!
Comments are closed.