Vinyl Siding Mold Removal A Homeowners Guide
Vinyl siding mold removal might sound daunting, but tackling it yourself is often achievable with the right knowledge and precautions. This guide walks you through identifying mold, safely removing it, and preventing future growth, empowering you to keep your home looking its best and protecting your family’s health. We’ll cover everything from simple cleaning solutions to knowing when to call in the pros.
Mold on vinyl siding is more common than you might think. Factors like humidity, shade, and poor drainage can all contribute to its growth. Early detection is key, so we’ll show you how to spot the signs and what to do if you find it. From choosing the right cleaning method (pressure washing or a detergent solution) to understanding the importance of safety gear, this guide provides a comprehensive approach to restoring your siding’s appearance and preventing further problems.
Identifying Mold on Vinyl Siding
Source: homeviable.com
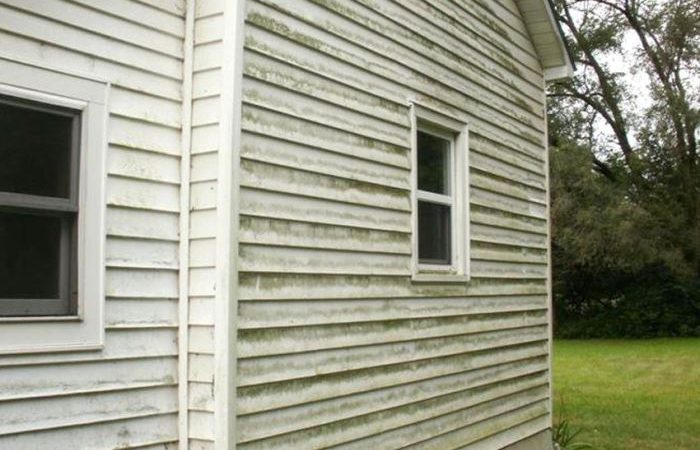
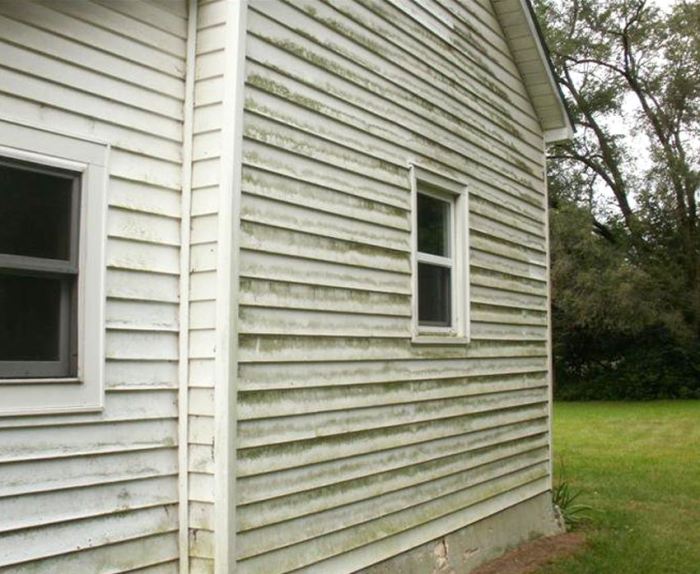
Mold growth on vinyl siding can significantly detract from your home’s curb appeal and, more importantly, potentially indicate a moisture problem that needs addressing. Early detection is key to preventing extensive damage and potential health issues. Learning to recognize the signs of mold is the first step in effective remediation.
Visual Characteristics of Mold on Vinyl Siding
Mold on vinyl siding typically presents as discoloration, often appearing as dark streaks, spots, or patches. The color can vary widely depending on the type of mold, ranging from black, brown, gray, green, or even a combination of colors. The texture might be fuzzy, slimy, or powdery, depending on the species and moisture levels. Sometimes, the mold might be subtle, appearing as a slight discoloration that’s easily overlooked, while other times it can be quite prominent and cover large areas of the siding. Pay close attention to areas with limited sunlight or poor ventilation, as these are prime locations for mold growth.
Types of Mold Commonly Found on Vinyl Siding
Many types of mold can thrive on vinyl siding, but some are more common than others. Cladosporium, for example, is a very common outdoor mold that often appears as dark gray or olive-green spots. Alternaria is another prevalent type, typically showing up as dark brown or black patches. These molds often grow in damp environments, feeding on organic matter that may have accumulated on the siding. Identifying the specific type of mold usually requires professional testing; however, recognizing the general appearance of mold growth is sufficient for initiating remediation efforts.
Factors Contributing to Mold Growth on Vinyl Siding
Several factors contribute to mold growth on vinyl siding. Excessive moisture is the primary driver. This moisture can originate from various sources, including leaky gutters, damaged flashing around windows and doors, poor drainage around the foundation, or even excessive humidity in the air. Shaded areas of the house, where moisture lingers longer, are particularly susceptible. The presence of organic matter, such as leaves, dirt, or algae, provides a food source for mold growth, further exacerbating the problem. Finally, lack of proper ventilation allows moisture to accumulate and creates ideal conditions for mold proliferation. Addressing these underlying issues is crucial for preventing future mold growth.
Homeowner Checklist for Identifying Potential Mold Problems
Before contacting a professional, homeowners can conduct a preliminary inspection. This checklist can help identify potential mold problems:
- Inspect the entire exterior of the house, paying close attention to shaded areas and areas near ground level.
- Look for discoloration on the vinyl siding, including dark streaks, spots, or patches of varying colors.
- Check for signs of moisture damage, such as water stains or peeling paint near the siding.
- Examine gutters and downspouts for proper drainage and any signs of blockage or leakage.
- Inspect the caulking around windows and doors for cracks or gaps that could allow water penetration.
- Assess the landscaping around the foundation to ensure proper grading and drainage.
If any of these issues are present, it is advisable to seek professional assessment and remediation.
Safety Precautions for Mold Removal
Tackling mold on your vinyl siding isn’t a job to take lightly. Mold can be a health hazard, and improper removal can expose you to harmful spores. Prioritizing safety is crucial for a successful and healthy cleanup. This section details the necessary precautions and equipment to keep you safe throughout the process.
Personal Protective Equipment (PPE)
Protecting yourself from mold exposure is paramount. The right PPE forms a crucial barrier against inhalation and skin contact with mold spores. This isn’t just about avoiding a minor inconvenience; it’s about preventing potential health problems. Inadequate protection can lead to allergic reactions, respiratory issues, or even more serious health complications.
- N95 Respirator: An N95 respirator is essential to prevent inhalation of mold spores. Make sure it fits properly to ensure maximum protection. A poorly fitting mask is essentially useless.
- Protective Gloves: Wear heavy-duty rubber or nitrile gloves to prevent skin contact with mold and cleaning solutions. Dispose of the gloves properly after use.
- Eye Protection: Safety glasses or goggles will protect your eyes from splashes of cleaning solutions or flying debris.
- Protective Clothing: Long sleeves, long pants, and closed-toe shoes will minimize skin exposure. Consider a disposable Tyvek suit for more thorough protection, especially for larger mold infestations.
Ventilation During Cleaning
Proper ventilation is crucial for reducing mold spore concentration in the air and minimizing your exposure. Mold spores thrive in damp, enclosed spaces, so increasing airflow is vital.
Before you start cleaning, open all windows and doors to create a cross-breeze. If possible, use fans to further increase air circulation. Consider using a HEPA filter vacuum to remove loose spores from the siding and surrounding areas after cleaning. This will help prevent the spores from settling and potentially re-growing.
Safe Handling of Mold-Contaminated Materials
Handling mold-contaminated materials requires careful attention to avoid spreading the spores. Improper disposal can lead to contamination of other areas and pose a health risk to yourself and others.
- Contain the Mold: Before you begin cleaning, try to contain the affected area as much as possible. This can involve using plastic sheeting or tarps to prevent the spread of spores during cleaning.
- Collect and Dispose: Use a sealed plastic bag to collect any moldy debris. Double bag the debris and clearly label the bag with “Mold Contaminated Material.” Dispose of the bag according to your local regulations. In some areas, this might involve special hazardous waste disposal.
- Clean Up Thoroughly: After cleaning, thoroughly clean all tools and equipment used in the process. This will help prevent the spread of mold spores to other areas. Dispose of cleaning rags and paper towels properly.
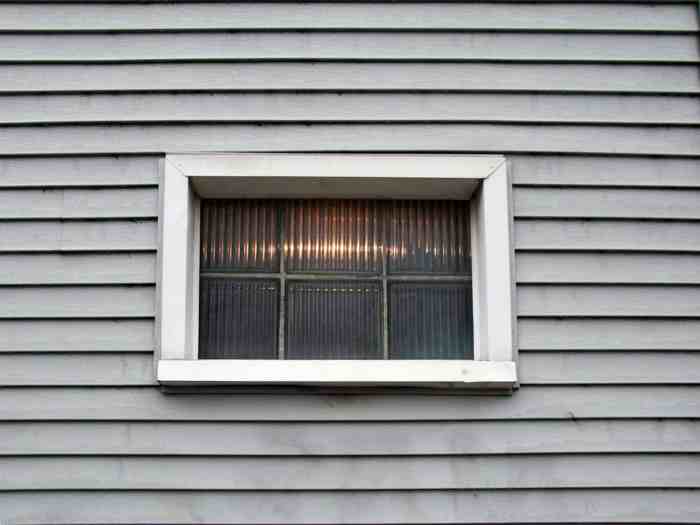
Methods for Vinyl Siding Mold Removal

Source: cdn-website.com
Getting rid of mold on your vinyl siding requires the right approach. Different methods offer varying levels of effectiveness, cost, and safety. Choosing the best method depends on the severity of the mold infestation and your comfort level with different cleaning techniques. Let’s explore some common options.
Comparing Vinyl Siding Mold Removal Methods
Several methods exist for tackling mold on vinyl siding, each with its pros and cons. Pressure washing is a powerful option, but it can damage siding if misused. A gentler approach involves scrubbing with a detergent solution. Let’s compare these methods in detail.
| Method | Effectiveness | Cost | Safety |
|---|---|---|---|
| Pressure Washing | High, effective for large areas and heavy mold growth. | Moderate to High (equipment rental or professional service). | Moderate to Low (risk of damage to siding if not used correctly, potential for water damage). Requires safety gear. |
| Scrubbing with Detergent | Moderate, best for smaller areas or light mold growth. | Low (detergent and brushes are inexpensive). | High (relatively safe, but still requires protective gloves). |
Pressure Washing for Mold Removal
Pressure washing can be highly effective, blasting away mold and mildew, but improper use can damage your siding. Always use a low-pressure nozzle (around 1500-2500 PSI) and keep the wand a few inches away from the surface to avoid gouging or damaging the vinyl. Work in sections, rinsing frequently. Wear protective eyewear and clothing. For particularly stubborn mold, a mixture of bleach and water (1 part bleach to 3 parts water) can be added to the pressure washer’s tank, but use caution and follow all safety precautions when handling bleach.
Cleaning Vinyl Siding with Detergent
For light mold infestations, a detergent solution often suffices. Mix a mild detergent (like dish soap) with water in a bucket. Use a soft-bristled brush or sponge to gently scrub the affected areas. Rinse thoroughly with clean water and allow the siding to air dry completely. Avoid harsh chemicals, as they can damage the vinyl. This method is more time-consuming than pressure washing but is gentler on the siding and less likely to cause damage. Remember to always wear protective gloves.
Cleaning Solutions and Materials: Vinyl Siding Mold Removal
Tackling mold on vinyl siding requires the right cleaning solutions and tools. Choosing the appropriate products ensures effective mold removal while protecting both your health and the environment. The key is to select solutions that are powerful enough to kill mold spores but gentle enough not to damage the siding.
Effective cleaning solutions for vinyl siding mold removal typically fall into two categories: bleach solutions and commercial mold cleaners. Both offer advantages, but understanding their proper dilution and application is crucial.
Bleach Solutions
Bleach is a cost-effective and widely available option for killing mold. However, it’s essential to dilute it correctly to avoid damaging your siding. A common solution involves mixing one part bleach with three parts water.
Always wear protective gear, including gloves and eye protection, when working with bleach.
Never mix bleach with ammonia or other cleaning products, as this can create toxic fumes. For heavily stained areas, you might need to let the bleach solution sit for a short period (a few minutes), but be careful to prevent prolonged contact to avoid discoloration. Rinse thoroughly with clean water afterward.
Commercial Mold Cleaners
Many commercial mold cleaners are specifically formulated for outdoor use on vinyl siding. These often contain powerful enzymes or other cleaning agents that effectively remove mold without harsh chemicals. Always follow the manufacturer’s instructions carefully regarding dilution ratios and application methods. Look for products that are labeled as safe for vinyl siding and environmentally friendly. Some commercial cleaners are designed to be sprayed on, while others require scrubbing.
Necessary Materials and Equipment
Preparing beforehand makes the cleaning process more efficient and safer. You’ll need the chosen cleaning solution (bleach or commercial cleaner), a garden sprayer or a bucket, a stiff-bristled brush (a long-handled brush helps reach higher areas), a scrub brush, clean rags or sponges, a hose with a spray nozzle, and safety gear (gloves, eye protection, and a mask is recommended). Consider using a pressure washer for stubborn mold, but keep the pressure low to prevent damage to the siding. Always test any cleaning solution in an inconspicuous area first to ensure it doesn’t damage the siding’s color or finish.
Environmentally Friendly Cleaning Solutions
Opting for environmentally friendly cleaning solutions minimizes the impact on the environment and your health. Look for products with biodegradable ingredients and minimal harsh chemicals. Vinegar, while not as powerful as bleach, is a natural alternative for less severe mold infestations. Dilute white vinegar with water (a 1:1 ratio is a good starting point) and apply it to the affected areas. Allow it to sit for a while before scrubbing and rinsing. Remember to always check the product label for environmental certifications or eco-friendly claims to ensure you’re making a responsible choice.
Preventing Future Mold Growth
Preventing mold growth on your vinyl siding is all about managing moisture. Mold thrives in damp environments, so by reducing moisture around your home, you significantly reduce the chances of future infestations. This involves a multi-pronged approach encompassing regular cleaning, proper maintenance, and improving your home’s ventilation.
Proper gutter maintenance plays a crucial role in preventing mold. Clogged gutters allow water to overflow and run down your siding, creating the perfect breeding ground for mold. Regular cleaning ensures water flows freely away from your home’s foundation and siding.
Gutter Maintenance for Mold Prevention
Regular gutter cleaning is essential. Aim for at least twice a year, in spring and fall, to remove leaves, debris, and other obstructions. Inspect gutters for any damage, such as holes or sagging, which can impede proper water drainage. Consider installing gutter guards to minimize the accumulation of debris. If you’re uncomfortable working at heights, hiring a professional gutter cleaning service is a safe and effective alternative. Neglecting gutter maintenance can lead to water damage, foundation problems, and, of course, significant mold growth on your siding.
Improving Home Ventilation to Reduce Moisture
Good ventilation is key to controlling moisture levels around your home. Proper attic ventilation, for example, prevents moisture buildup that can lead to mold growth in your attic and potentially seep down into your walls and siding. Ensure your attic has adequate ventilation with vents or fans. Similarly, proper bathroom ventilation is crucial. Make sure bathroom exhaust fans are working correctly and run them for a sufficient time after showering or bathing to remove moisture. Properly functioning range hoods in the kitchen also help prevent moisture buildup. In basements, consider using a dehumidifier to reduce excess moisture. These steps collectively contribute to a drier environment, discouraging mold growth.
Regular Cleaning and Maintenance Schedule
A proactive approach to cleaning your vinyl siding can prevent mold from taking hold. A regular cleaning schedule should include washing your siding at least once or twice a year, depending on your climate and the amount of tree cover around your house. Use a solution of mild detergent and water, applying it with a soft-bristled brush or pressure washer (on a low setting to avoid damaging the siding). Focus on areas prone to moisture buildup, such as near downspouts and ground level. After cleaning, allow the siding to dry completely. Regular inspection for any signs of mold or damage is crucial. Early detection allows for prompt action, preventing small problems from becoming large and costly ones. For example, a small mold spot treated promptly might require only a simple cleaning solution, while a large infestation could necessitate more extensive and costly remediation.
Severe Mold Infestation
Source: revivesoftwash.net
Dealing with mold on your vinyl siding is usually manageable with DIY methods, but some situations call for professional help. Knowing when to call in the experts is crucial to preventing further damage and ensuring your family’s health. This section discusses articles on when professional mold remediation is necessary and how to find a reputable company.
Severe mold infestations go beyond surface staining. We’re talking about large areas of affected siding, mold penetration into the underlying structure (like the wood sheathing), and a musty odor that’s pervasive and doesn’t dissipate with cleaning. These situations pose significant health risks and can lead to extensive and costly repairs if not addressed properly.
Identifying Situations Requiring Professional Mold Remediation, Vinyl siding mold removal
Extensive mold growth covering more than 10% of your home’s siding, particularly if it’s spreading rapidly, is a clear sign you need professional help. If you notice mold behind the siding, indicated by discoloration or water damage, professional inspection is essential. Similarly, if you suspect mold has penetrated the wall cavity, creating a potential breeding ground for further growth and structural damage, professional intervention is non-negotiable. A musty odor that persists despite cleaning attempts, along with visible mold growth in multiple areas, indicates a larger problem beyond the scope of DIY solutions.
The Importance of Contacting Qualified Professionals for Extensive Mold Problems
DIY mold removal is appropriate for small, superficial infestations. However, severe mold infestations require specialized equipment and expertise to ensure complete removal and prevent recurrence. Qualified professionals possess the knowledge to identify the type of mold, determine the extent of the infestation, and implement appropriate remediation strategies, minimizing health risks and preventing future problems. Ignoring extensive mold growth can lead to structural damage, costly repairs, and serious health consequences for occupants, particularly those with respiratory sensitivities. A professional can also handle proper disposal of contaminated materials, minimizing environmental impact.
Finding and Hiring a Reputable Mold Remediation Company
Finding a qualified mold remediation company involves thorough research. Check online reviews and ratings from sites like the Better Business Bureau. Look for companies with certifications from organizations like the Institute of Inspection, Cleaning and Restoration Certification (IICRC). Verify their insurance and licensing information. Obtain multiple estimates and compare their approaches, ensuring they address both mold removal and the underlying cause of the moisture problem. Ask about their safety protocols and waste disposal methods. Don’t hesitate to ask for references and contact previous clients to inquire about their experiences.
Documenting the Extent of Mold Damage
Before contacting a professional, thoroughly document the mold damage. Take numerous high-resolution photographs and videos of all affected areas, including close-ups of the mold growth and its extent. Note the location and size of affected areas, and if possible, measure the affected area. Keep a detailed written record of your observations, including the date, time, and specific areas affected. This documentation serves as a valuable reference for the professional and will help you track the remediation progress. This detailed record also protects your interests if disputes arise.
Illustrative Examples
Let’s look at some real-world examples of mold on vinyl siding and how to tackle it, ranging from manageable to severe cases requiring professional help. Understanding these scenarios will help you assess your situation and choose the right course of action.
Moderate Mold Growth on Vinyl Siding
Imagine a section of your south-facing vinyl siding, approximately 5 feet wide and 3 feet high, showing noticeable black and green discoloration. The mold appears as small, scattered patches, not forming a continuous layer. This is a classic case of moderate mold growth, typically caused by prolonged exposure to moisture and shade. To remove this, you would first thoroughly wet the affected area with a garden hose to prevent mold spores from becoming airborne during cleaning. Next, apply a solution of one part bleach to three parts water using a scrub brush, paying close attention to the discolored areas. Allow the solution to sit for about 10-15 minutes before scrubbing again. Finally, rinse the area thoroughly with clean water and allow it to dry completely. Regularly inspecting this area and promptly addressing any future moisture issues will prevent recurrence.
Visual Description of Mold-Damaged Vinyl Siding Before and After Cleaning
Before cleaning, the vinyl siding exhibited a dull, mottled appearance. Patches of black and dark green mold were scattered across the surface, particularly in crevices and shaded areas. The color of the vinyl itself appeared slightly faded and stained beneath the mold. The overall impression was one of uncleanliness and potential damage. After thorough cleaning, the siding regained its original, bright white color. The mold stains were completely removed, revealing the smooth, clean surface of the vinyl. The siding looked refreshed, clean, and significantly improved in aesthetic appeal. The difference was dramatic, showcasing the effectiveness of proper cleaning techniques.
Severe Mold Infestation
Consider a scenario where extensive black mold covers a large portion of your home’s vinyl siding, reaching up to the roofline. The mold is thick, appears to be deeply embedded in the siding, and has a musty, unpleasant odor. This represents a severe mold infestation, potentially indicating a significant underlying moisture problem like a leaking roof or faulty gutter system. In such a situation, attempting DIY removal is strongly discouraged. The extensive growth and potential for deep penetration into the siding and underlying structure pose significant health risks. Professional mold remediation specialists are necessary. They possess the expertise, equipment (such as specialized cleaning solutions and safety gear), and knowledge to safely and effectively remove the mold, identify and address the root cause of the problem, and ensure the safety of the occupants. They will also provide proper documentation and potentially address any structural damage caused by the infestation.
Final Thoughts
Successfully removing mold from your vinyl siding doesn’t have to be a stressful ordeal. By following the steps outlined in this guide, you can effectively tackle mold growth, whether it’s a small patch or a more extensive infestation. Remember to prioritize safety, use appropriate cleaning solutions, and maintain regular cleaning to prevent future problems. Knowing when to seek professional help is just as important as knowing how to handle smaller issues yourself. With a proactive approach, you can keep your vinyl siding looking clean, fresh, and mold-free for years to come.
Comments are closed.