Vinyl Siding Cleaner A Complete Guide
Vinyl siding cleaner: Keeping your home’s exterior looking fresh and vibrant is easier than you think! This guide dives into everything you need to know about effectively cleaning your vinyl siding, from choosing the right cleaner to mastering the cleaning techniques. We’ll cover various methods, tackle tough stains, and help you keep your siding looking its best for years to come.
Whether you’re a seasoned DIYer or a first-timer, we’ll walk you through the process step-by-step, ensuring you achieve sparkling results without damaging your siding. We’ll explore different cleaner types, safety precautions, and post-cleaning maintenance tips to keep your home looking its absolute best.
Types of Vinyl Siding Cleaners
Cleaning your vinyl siding can significantly improve its appearance and longevity. Choosing the right cleaner is crucial for effective cleaning without damaging the siding. Different cleaners offer varying levels of cleaning power and are suited for different levels of dirt and grime.
Vinyl Siding Cleaner Types and Their Composition
The effectiveness of a vinyl siding cleaner depends heavily on its chemical composition. Here’s a breakdown of common types and their active ingredients:
| Cleaner Type | Active Ingredients | Advantages | Disadvantages |
|---|---|---|---|
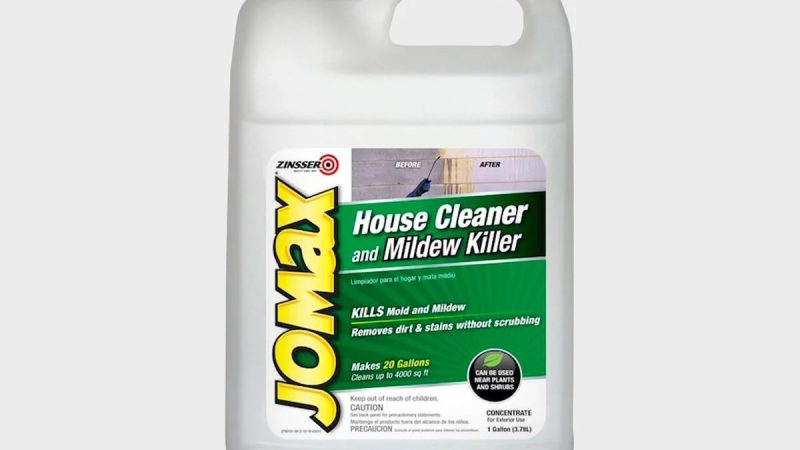
| Soap-Based | Mild detergents, surfactants | Gentle, safe for most vinyl siding, readily available | May not be effective against stubborn stains or mildew; requires more scrubbing |
| Bleach-Based | Sodium hypochlorite (bleach), surfactants | Effective against mildew and algae, relatively inexpensive | Can discolor siding if used improperly or left on too long; harsh on plants and potentially harmful to humans |
| Specialized Cleaners | Vary widely; may include oxygen bleach, surfactants, other cleaning agents | Formulated for specific cleaning tasks (e.g., mildew removal, stain removal); often more effective than soap and water | Can be more expensive than soap-based or bleach-based cleaners; may require specific application techniques |
Detailed Chemical Composition of Three Vinyl Siding Cleaners
Let’s examine the chemical composition of three examples:
1. Simple Soap and Water Solution: This typically involves a mild dish soap (containing surfactants like sodium lauryl sulfate) diluted in warm water. The surfactants reduce the surface tension of the water, allowing it to better penetrate and lift dirt. The soap itself acts as a detergent, binding to dirt particles and allowing them to be rinsed away.
2. Bleach Solution: A common bleach solution for siding might contain a 1:10 ratio of household bleach (5.25% sodium hypochlorite) to water. The sodium hypochlorite is a powerful oxidizing agent, effectively breaking down organic matter like mildew and algae. Surfactants may also be added to improve cleaning action. The exact chemical composition will vary depending on the brand and concentration of bleach used.
3. Commercial Vinyl Siding Cleaner (Example): Many commercial cleaners contain a proprietary blend of surfactants, chelating agents (to help remove mineral deposits), and possibly oxygen bleach (sodium percarbonate). The exact composition is usually not publicly disclosed for proprietary reasons, but the general function is to provide a powerful yet relatively safe cleaning solution.
Soap and Water vs. Commercial Cleaners: A Comparison
Soap and water provide a gentle and safe cleaning method suitable for light dirt and grime. It’s environmentally friendly and inexpensive. However, it may struggle with stubborn stains like mildew or algae. Commercial vinyl siding cleaners, on the other hand, often contain stronger cleaning agents that effectively tackle these tougher stains. They are generally more expensive but provide a more thorough clean, saving time and effort in the long run. The choice depends on the level of soiling and the desired level of cleaning. For heavily soiled siding or significant mildew growth, a commercial cleaner is often the better option. For routine maintenance, soap and water might suffice.
Cleaning Methods and Procedures
Source: oconnorroofingbuffalo.com
Cleaning vinyl siding effectively depends on choosing the right method and following safe procedures. Different levels of dirt and grime require different approaches, ranging from gentle cleaning to more powerful methods. Understanding these methods will help you achieve the best results while protecting your siding.
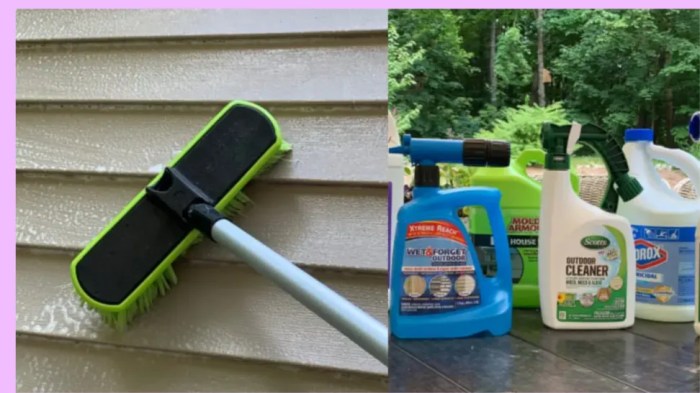
Three common methods for cleaning vinyl siding are pressure washing, soft washing, and scrubbing. Pressure washing uses high-pressure water to blast away dirt, while soft washing employs a low-pressure solution of soap and water. Scrubbing is a more hands-on approach, ideal for smaller areas or stubborn stains.
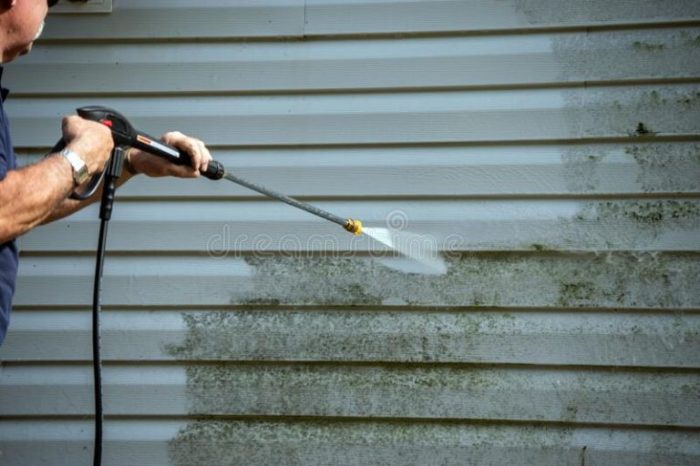
Pressure Washing Vinyl Siding
Pressure washing is a fast and effective way to clean large areas of vinyl siding, but it requires caution to avoid damaging the siding. Improper use can lead to gouges, scratches, or even the removal of the siding’s protective layer. Therefore, following a step-by-step guide is crucial.
- Prepare the area: Clear the area around your house of any obstacles, such as furniture, plants, or loose debris. Cover any landscaping features you can’t move to protect them from water damage.
- Choose the right nozzle: Use a wide, low-pressure nozzle (typically a 25-degree nozzle or a fan-tip nozzle) to prevent damage. Avoid using a narrow, high-pressure nozzle.
- Mix cleaning solution (optional): For heavily soiled siding, mix a solution of mild detergent and water according to the detergent’s instructions. Apply this solution to the siding before pressure washing.
- Start at the top: Begin washing at the highest point of the siding and work your way down. This prevents already cleaned areas from becoming re-soiled.
- Maintain a safe distance: Keep the nozzle at least 12-18 inches away from the siding to prevent damage. Overly proximity can cause gouging or even penetration.
- Overlap passes: Overlap each pass by about 50% to ensure complete coverage and even cleaning.
- Rinse thoroughly: Rinse the siding completely with clean water to remove all traces of cleaning solution. Allow the siding to air dry completely.
Choosing a Cleaning Method
Selecting the appropriate cleaning method depends on the condition of your siding and the severity of the dirt. A flowchart can help visualize this decision-making process.
Imagine a flowchart with three main branches stemming from a starting point labeled “Assess Siding Condition & Soil Level”. The first branch, “Light Soil, Good Condition”, leads to a box indicating “Scrubbing with mild detergent and water is sufficient”. The second branch, “Moderate Soil, Good Condition”, leads to a box recommending “Soft washing with a low-pressure sprayer and appropriate detergent”. The third branch, “Heavy Soil or Damaged Siding”, leads to a box advising “Consult a professional cleaning service; pressure washing may damage the siding”.
Pre-Cleaning Preparation and Safety
Proper preparation before cleaning your vinyl siding is crucial for achieving the best results and ensuring your safety. Taking the time to inspect your siding and protect surrounding areas will prevent accidental damage and make the cleaning process much smoother. Remember, safety should always be your top priority when working with cleaning solutions.
Pre-cleaning preparation involves more than just grabbing your cleaning supplies. A thorough inspection of your siding will help you identify any potential problems before you start cleaning. Protecting surrounding areas like landscaping, windows, and walkways will prevent damage from cleaning solutions or accidental splashes. Properly mixing and diluting your cleaner according to the manufacturer’s instructions is also key to avoiding damage to your siding and ensuring effectiveness.
Siding Inspection and Area Protection
Before you even think about breaking out the cleaning solution, take a good look at your vinyl siding. Check for any loose or damaged sections, cracks, or areas that might be particularly vulnerable to damage. Note any areas of discoloration that might require extra attention. For instance, if you notice a section of particularly stubborn mildew, you might need to pre-treat it with a stronger solution before proceeding with the overall cleaning. Next, protect areas around your house. Cover delicate plants with drop cloths or move them out of the way. Consider masking off windows and doors to prevent accidental spraying of cleaning solution. You might also want to use painter’s tape to protect any trim or other delicate features. Think of it as prepping for a paint job – protecting the surrounding areas is just as important as cleaning the siding itself.
Essential Safety Equipment
Working with cleaning solutions, even those specifically designed for vinyl siding, requires appropriate safety precautions. A crucial part of this is using the right personal protective equipment (PPE). This should include: safety goggles or glasses to protect your eyes from splashes, rubber or nitrile gloves to protect your hands from the cleaning solution, and a long-sleeved shirt and long pants to protect your skin. A respirator or dust mask might also be necessary, especially if you are dealing with mold or mildew, to avoid inhaling any spores or chemicals. Depending on the height of your house and your cleaning method, a sturdy ladder or scaffolding may also be needed. Always ensure your ladder is properly positioned and secured before climbing.
Mixing and Diluting Vinyl Siding Cleaners
Always follow the manufacturer’s instructions precisely when mixing and diluting vinyl siding cleaners. This information is usually found on the product label. For example, a cleaner might instruct you to mix one part cleaner with three parts water. This means that for every one cup of cleaner, you would add three cups of water. Never exceed the recommended concentration, as this could damage your siding or make the solution too harsh. Use a measuring cup or jug to ensure accuracy. Remember, using the correct dilution is vital to both the effectiveness of the cleaner and the safety of your siding and yourself. Thoroughly mix the solution before using it to ensure even distribution of the cleaning agents. If the instructions recommend pre-mixing, allow the solution to sit for the recommended time before application.
Post-Cleaning Maintenance and Care
Source: cloudinary.com
Keeping your vinyl siding looking its best after a thorough cleaning requires ongoing effort. Regular maintenance not only enhances the curb appeal of your home but also significantly extends the lifespan of your siding, saving you money on costly replacements down the line. This section will provide simple yet effective strategies for maintaining clean siding and addressing common post-cleaning issues.
Following a cleaning, it’s crucial to implement a proactive maintenance plan to prevent future staining and preserve the pristine look you’ve achieved. Consistent upkeep will minimize the need for future intensive cleaning sessions, saving you time and effort.
Tips for Maintaining Clean Vinyl Siding
These simple tips can help you keep your vinyl siding clean and looking its best for years to come. Regular attention to these details will significantly reduce the buildup of dirt, grime, and other contaminants.
- Regularly rinse your siding with a garden hose. A quick rinse every few weeks, particularly after periods of heavy rain or wind, can remove loose dirt and debris before it sets in.
- Inspect your siding regularly for any signs of damage, such as cracks, holes, or loose panels. Address these issues promptly to prevent further damage and water penetration.
- Trim overhanging branches and shrubs. Overhanging vegetation can trap moisture and debris against the siding, promoting mold and mildew growth.
- Clean gutters and downspouts regularly. Clogged gutters can lead to water overflow, which can damage your siding and foundation.
- Use a soft-bristled brush to gently remove loose dirt and cobwebs from the siding surface. Avoid harsh scrubbing that could scratch the vinyl.
- Consider using a pressure washer (with low pressure) only for very stubborn stains or mildew, focusing on a thorough rinse afterwards to prevent residue buildup.
Common Post-Cleaning Problems and Solutions
Even with careful cleaning, some issues might arise. Knowing how to address these problems quickly can prevent them from escalating into more significant concerns.
- Streaking: Streaks can occur if the cleaning solution isn’t thoroughly rinsed or if uneven pressure is used during washing. Solution: Re-rinse the affected area thoroughly with clean water, ensuring complete removal of any cleaning residue.
- Water Stains: These are often caused by mineral deposits in the water. Solution: A vinegar and water solution (equal parts) can help remove these stains. Apply, let it sit briefly, and rinse thoroughly.
- Mildew or Mold Recurrence: This can happen if the source of moisture isn’t addressed. Solution: Identify and eliminate sources of moisture (e.g., leaky gutters, overhanging branches), and consider using a mildew-resistant cleaner for future cleaning.
- Scratches: These can result from using abrasive cleaners or brushes. Solution: Unfortunately, scratches are generally permanent, but they can often be minimized by using proper cleaning techniques and avoiding harsh scrubbing.
Importance of Regular Maintenance for Vinyl Siding Lifespan
Regular maintenance is paramount to prolonging the life of your vinyl siding. Neglecting maintenance can lead to premature deterioration and costly repairs or replacements. Proactive care prevents the accumulation of dirt, mildew, and other damaging elements that can compromise the structural integrity and aesthetic appeal of your siding.
For example, a home in a heavily wooded area may require more frequent cleaning due to increased leaf and debris accumulation. Similarly, homes in coastal areas may experience more rapid discoloration from salt spray, requiring more frequent cleaning and potential use of specialized cleaning products.
Dealing with Specific Stains and Issues: Vinyl Siding Cleaner
Vinyl siding, while durable, can fall victim to various stains and blemishes over time. Understanding the source of these stains is key to effective cleaning and restoring your siding’s original beauty. This section will focus on three common culprits: mildew, algae, and rust, outlining effective removal techniques while emphasizing safety precautions.
Common Vinyl Siding Stains
Three common types of stains that plague vinyl siding are mildew, algae, and rust. Mildew is a type of fungus that appears as a fuzzy, often white or grayish growth, thriving in damp, shady areas. Algae, another type of plant life, presents as a dark green or black discoloration, frequently found on north-facing sides of houses. Rust stains, typically orange or brown, are caused by iron oxide leaching from metal objects like gutters, downspouts, or even nearby metal structures. These stains can significantly detract from the appearance of your home’s exterior.
Stain Removal Techniques
The following table compares different removal methods for mildew, algae, and rust stains, considering their effectiveness and associated safety measures. Remember to always test any cleaning solution on an inconspicuous area first to check for discoloration or damage.
| Stain Type | Removal Method | Effectiveness | Safety Precautions |
|---|---|---|---|
| Mildew | Solution of bleach (1 part bleach to 3 parts water), a commercial mildew remover, or a pressure washer with appropriate nozzle. | Highly effective, especially for fresh mildew. Stubborn mildew may require repeated applications. | Wear protective gloves, eye protection, and long sleeves. Ensure adequate ventilation. Avoid mixing bleach with other cleaning products. |
| Algae | A solution of trisodium phosphate (TSP) (follow product instructions carefully), a commercial algae remover, or a pressure washer. | Generally effective, though persistent algae may need multiple treatments. | Wear protective gloves and eye protection. TSP is caustic; handle with care and rinse thoroughly. Ensure good ventilation. |
| Rust | Commercial rust stain remover, oxalic acid solution (follow product instructions carefully), or a specialized rust-removing product designed for vinyl siding. | Effectiveness varies depending on the age and severity of the stain. Fresh rust stains are easier to remove. | Wear protective gloves and eye protection. Oxalic acid is corrosive; handle with extreme caution. Ensure adequate ventilation. |
Removing Stubborn Mold and Mildew
Persistent mold and mildew require a more aggressive approach. For stubborn stains, a two-step process often proves effective. First, thoroughly scrub the affected area with a stiff brush and a solution of bleach and water (again, 1 part bleach to 3 parts water), paying close attention to crevices and seams. Allow the solution to dwell for 10-15 minutes before rinsing thoroughly with clean water. If the stain persists, consider using a pressure washer with a low-pressure nozzle to gently lift the remaining mildew. Remember to always test a small, inconspicuous area before proceeding with a wider application. For extremely stubborn cases, consider consulting a professional pressure washing service. They have the equipment and expertise to tackle challenging mold and mildew problems safely and effectively.
Environmental Considerations
Source: techicy.com
Cleaning your vinyl siding might seem like a simple task, but the products and methods you choose can have a significant impact on the environment. Understanding the environmental footprint of your cleaning routine allows for more responsible choices that protect both your home and the planet. This section will explore the environmental implications of various vinyl siding cleaning products and practices, guiding you towards eco-friendlier options.
Choosing environmentally friendly cleaning solutions is crucial for minimizing your impact on the environment. The key difference lies in the use of biodegradable versus non-biodegradable ingredients. Biodegradable cleaners break down naturally, minimizing long-term pollution. Non-biodegradable cleaners, on the other hand, persist in the environment for extended periods, potentially harming ecosystems and wildlife.
Biodegradable vs. Non-Biodegradable Cleaning Solutions
Biodegradable cleaning solutions are formulated using ingredients that naturally decompose, reducing their environmental impact. These often utilize plant-based surfactants and enzymes instead of harsh chemicals. Examples include cleaners made with citrus extracts or other naturally derived ingredients. In contrast, non-biodegradable cleaners frequently contain synthetic chemicals that resist decomposition, leading to water pollution and potential harm to aquatic life. These often contain phosphates or other persistent chemicals. The choice between these two significantly impacts the overall environmental footprint of your cleaning project. Using biodegradable options is the more sustainable choice.
Responsible Disposal of Cleaning Solutions and Waste Materials
Proper disposal of cleaning solutions and waste materials is essential to prevent environmental contamination. Never pour cleaning solutions down the drain or onto the ground. Instead, follow the instructions on the product label for proper disposal. Many communities offer hazardous waste collection days or facilities where you can safely dispose of chemical cleaners. Rinse all cleaning equipment thoroughly before disposal. For any solid waste materials such as rags or sponges used in the cleaning process, dispose of them according to your local guidelines. This may involve placing them in regular trash or recycling depending on their composition. Remember, responsible disposal protects water sources and prevents harm to wildlife.
Illustrative Examples

Source: familyhandyman.com
Let’s look at some real-world scenarios to illustrate the vinyl siding cleaning process, highlighting the challenges and the satisfying results. Understanding these examples will help you tackle your siding cleaning project with confidence.
Imagine a homeowner with a two-story house, its vinyl siding heavily soiled after years of exposure to the elements. The siding, originally a crisp white, is now streaked with brown mildew, covered in patches of green algae, and shows significant dirt accumulation near the ground. The texture, once smooth, feels rough to the touch in places. This level of soiling presents a significant challenge, requiring a more thorough approach than a simple rinse.
Heavily Soiled Siding Cleaning Scenario
The homeowner begins by pre-cleaning the area, removing loose debris like leaves and cobwebs. Next, they mix a solution of a vinyl-safe cleaner and water according to the product instructions. Using a low-pressure sprayer (to avoid damaging the siding), they thoroughly saturate the soiled areas. Allowing the cleaner to dwell for the recommended time, they then scrub the siding with a soft-bristled brush, paying extra attention to stubborn mildew and algae stains. Finally, they rinse the siding with clean water, using a garden hose with a nozzle adjusted to a gentle spray. The result? The siding is noticeably cleaner, its original white color restored in many areas, though some persistent stains might require a second application or a more targeted approach with a specialized stain remover.
Before and After Appearance, Vinyl siding cleaner
Before cleaning, the vinyl siding appeared dull, discolored, and uneven in texture. The once-vibrant color was muted, obscured by layers of dirt, mildew, and algae. The surface felt rough in many places due to the buildup of organic matter. After cleaning, the siding regained its original brightness and smoothness. The colors were more vivid, and the overall condition of the siding improved significantly. The texture returned to its original smooth state, and the previously obscured details of the siding’s design became visible. The difference was dramatic, transforming the house’s appearance from drab and neglected to clean and refreshed.
Types of Vinyl Siding Damage
Even with careful cleaning, some damage to the vinyl siding might be revealed or exacerbated. Understanding these potential issues allows for appropriate action.
Cracks in the vinyl siding often appear as thin lines or fissures, sometimes accompanied by slight discoloration. These cracks can be caused by impacts, extreme temperature changes, or age. Scratches, usually superficial, might appear as shallow gouges or abrasions on the surface. They often result from contact with sharp objects or rough handling. Discoloration, beyond simple soiling, can manifest as faded areas, yellowing, or uneven patches of color. This can result from prolonged sun exposure, chemical reactions, or damage to the vinyl’s protective layer. Significant damage may require repair or replacement of the affected siding panels.
Ultimate Conclusion
Cleaning vinyl siding doesn’t have to be a daunting task. By following the tips and techniques outlined in this guide, you can easily maintain the beauty and longevity of your home’s exterior. Remember to always prioritize safety, choose the appropriate cleaning method for your siding’s condition, and enjoy the satisfaction of a sparkling clean home. A little effort goes a long way in preserving the curb appeal and value of your property!
Comments are closed.