How to Fix Vinyl Siding A DIY Guide
How to fix vinyl siding? It’s a question many homeowners face. From minor cracks to more significant damage, understanding how to assess and repair vinyl siding can save you time and money. This guide walks you through identifying problems, assessing the damage, and performing both minor repairs and larger replacements. We’ll cover everything from choosing the right materials to preventative maintenance, ensuring your home’s exterior stays looking its best.
We’ll explore common issues like cracks, gaps, and discoloration, providing clear visual examples and step-by-step instructions for repairs. You’ll learn when a DIY approach is suitable and when it’s best to call in a professional. We’ll also cover essential tools and safety precautions, equipping you with the knowledge to tackle those pesky siding problems confidently.
Identifying Vinyl Siding Problems
Vinyl siding, while durable, isn’t indestructible. Understanding common problems helps you address them quickly and prevent further damage. Knowing the difference between minor and major issues also helps determine whether you can tackle the repair yourself or need to call a professional.
Common problems include cracks, gaps, discoloration, and damage from impact. Cracks can range from small hairline fractures to larger splits, often appearing near fasteners or edges. Gaps might form between panels, allowing water infiltration. Discoloration, usually fading or staining, can be caused by sun exposure, mildew, or other environmental factors. Impact damage, such as dents or holes, typically results from collisions with objects like sports equipment or falling branches.
Types of Vinyl Siding Damage
The following table provides examples of different types of vinyl siding damage, their causes, and typical repair methods. Identifying the type of damage is crucial for selecting the appropriate repair technique.
| Damage Type | Description | Cause | Repair Method |
|---|---|---|---|
| Cracked Panel | A visible crack or split in the vinyl siding panel. Can be hairline or larger. | Expansion and contraction due to temperature changes, impact, or faulty installation. | Replacing the damaged panel. For small cracks, carefully filling with a vinyl-compatible caulk might suffice. |
| Gaps Between Panels | Spaces between adjacent siding panels, often visible as gaps or openings. | Improper installation, settling of the house, or expansion and contraction. | Careful realignment and resealing the joints with caulk. In severe cases, panel replacement may be needed. |
| Discoloration | Fading, staining, or streaking of the siding’s color. | Prolonged sun exposure, mildew growth, or chemical spills. | Cleaning with a mild detergent and water solution. For severe staining, a specialized siding cleaner might be necessary. In some cases, repainting or replacing severely affected panels may be the only option. |
| Impact Damage | Dents, holes, or punctures in the siding. | Impact from objects such as thrown balls, falling branches, or accidental collisions. | For small dents, gentle warming with a hairdryer may help restore the shape. Larger holes or significant damage will require panel replacement. |
Distinguishing Minor from Major Damage
Minor damage is typically limited to small cracks, minor discoloration, or superficial dents that don’t compromise the structural integrity of the siding or allow water penetration. Major damage, on the other hand, involves larger cracks, significant gaps, extensive discoloration, or holes that create openings for water and insects. Major damage often necessitates replacing the affected panels. If you’re unsure whether the damage is minor or major, it’s always best to err on the side of caution and consult a professional.
Assessing the Extent of Damage
Before you start repairing your vinyl siding, you need a clear understanding of the damage. A thorough inspection will help you determine the best course of action and the materials you’ll need. This process is crucial for efficient repairs and preventing further damage.
Proper assessment involves a systematic visual inspection, allowing you to identify the type, location, and severity of any problems. This step will save you time and money in the long run by ensuring you address the issues effectively.
Inspection Procedure
To begin, you’ll need a few simple tools: a ladder (if necessary), work gloves, a putty knife or scraper (for gently probing loose areas), and a camera to document the damage. Start by visually inspecting the entire siding from ground level, noting any obvious damage. Then, using the ladder safely, move to a higher vantage point to examine areas you couldn’t see from the ground. Carefully examine each panel for cracks, holes, dents, discoloration, and loose or missing pieces. Use the putty knife to gently probe any suspicious areas to check for weakness or detachment. Remember to always prioritize safety when using a ladder. Take detailed photos of all damaged areas. This will serve as a valuable reference point during the repair process.
Factors Affecting Damage Severity
Determining the severity of the damage involves considering several key factors. These factors help you prioritize repairs and estimate the time and resources required.
- Size and Number of Damaged Areas: A few small cracks are less serious than widespread damage across multiple panels.
- Type of Damage: A simple crack is easier to repair than a large hole or a severely warped panel.
- Location of Damage: Damage near corners or edges might be more structurally significant than damage in the middle of a wall.
- Underlying Damage: Check for damage to the sheathing or house wrap beneath the siding. This could indicate more extensive repair work.
- Water Intrusion: Look for signs of water damage, such as discoloration, rot, or mold. Water damage often requires more extensive repairs.
Siding Condition Checklist
This checklist provides a structured approach to evaluating your siding’s overall condition. Complete and thorough documentation is crucial for effective repairs.
| Siding Area | Condition | Notes |
|---|---|---|
| North Side | Good/Fair/Poor | Specify damage type and location (e.g., cracks near window, loose panel at corner) |
| South Side | Good/Fair/Poor | Specify damage type and location |
| East Side | Good/Fair/Poor | Specify damage type and location |
| West Side | Good/Fair/Poor | Specify damage type and location |
| Overall Condition | Good/Fair/Poor | Summary assessment |
Repairing Minor Damage
Fixing small blemishes on your vinyl siding is often a straightforward DIY project. With the right materials and a little patience, you can restore your home’s exterior to its former glory. This section details how to tackle minor damage, ensuring a professional-looking repair.
Before starting any repair, thorough cleaning and preparation are crucial for optimal adhesion and a lasting fix. Dirt, grime, and loose paint can prevent proper bonding, leading to premature failure of your repair. Always start with a clean surface.
Cleaning and Preparing the Siding
Cleaning the affected area involves more than just a quick wipe-down. First, use a garden hose with a nozzle to rinse away loose dirt and debris. For stubborn stains, a solution of mild dish soap and water applied with a soft-bristled brush will work wonders. Rinse thoroughly again to remove all traces of soap. Allow the siding to dry completely before proceeding with any repairs. This ensures the patching compound or caulk will adhere properly. If mildew is present, use a mildew remover according to the product instructions, followed by a thorough rinsing and drying.
Repairing Small Cracks and Holes
Small cracks can be effectively sealed using a high-quality exterior-grade caulk designed for vinyl siding. Choose a caulk that is paintable and matches the color of your siding as closely as possible. Apply the caulk neatly into the crack, using a caulking gun and smoothing it out with a damp finger or a putty knife. Allow the caulk to cure completely according to the manufacturer’s instructions before painting. For small holes, a vinyl siding patch, available at most home improvement stores, can be used. These patches are typically self-adhesive and easily applied. Follow the manufacturer’s instructions carefully for best results. If the hole is larger, you may need to use a patching compound designed for exterior use. Apply the compound, smoothing it level with the siding surface, and allow it to dry before painting.
Painting or Repainting Damaged Sections
Once the repairs are complete and fully cured, you’ll likely need to touch up the paint to blend the repair seamlessly with the surrounding siding. Choose an exterior-grade paint that matches your siding’s color. Test the paint on an inconspicuous area first to ensure a good color match. Apply the paint in thin, even coats, allowing each coat to dry completely before applying the next. For best results, use a small brush or a fine-tipped roller to avoid overlapping onto the undamaged areas. Multiple thin coats are better than one thick coat to prevent drips and ensure even coverage. Remember to clean your brushes thoroughly after use.
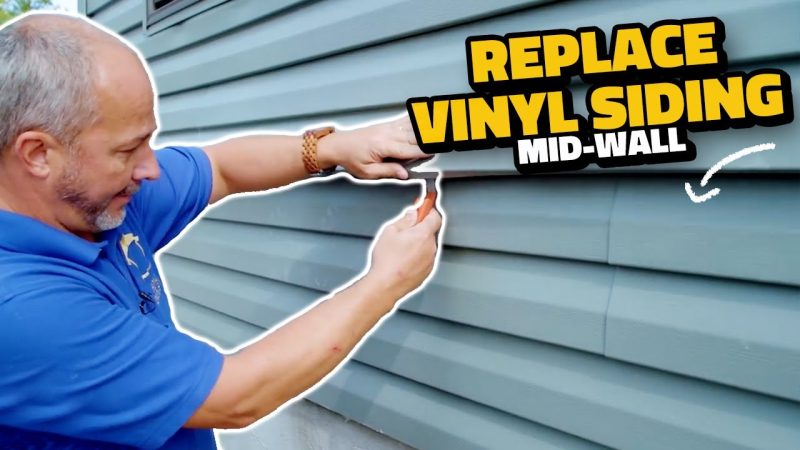
Replacing Damaged Sections
Replacing damaged vinyl siding sections is a straightforward process, but careful attention to detail ensures a professional-looking and long-lasting repair. This involves removing the damaged panel, accurately measuring for a replacement, and then installing the new panel correctly to maintain the integrity of your siding. Remember safety first; always wear appropriate safety glasses and gloves.
Replacing a damaged section typically involves removing the damaged panel and its adjacent panels to ensure proper alignment and installation of the new piece. This method is preferred over simply patching a small area, as it creates a more seamless and visually appealing result. The process requires patience and attention to detail, but the results are worth the effort.
Removing Damaged Panels
Before beginning, identify the damaged panel and any surrounding panels that need removal for proper replacement. Start by carefully prying loose the bottom edge of the damaged panel using a putty knife or similar tool. Work your way up, gently releasing the panel from the underlying structure. Remember, vinyl siding is relatively fragile, so avoid excessive force to prevent further damage. Once the bottom is loose, carefully lift the panel outward, taking care not to scratch or damage the surrounding siding or the house. Repeat this process for any adjacent panels that need replacing to ensure a clean and even repair. Once removed, inspect the underlying sheathing or wall for any additional damage that needs addressing before installation of the new panel.
Measuring and Cutting Replacement Panels
Accurate measurement is crucial for a perfect fit. Use a tape measure to carefully determine the exact dimensions of the damaged panel(s). Account for any overlap with adjacent panels. Transfer these measurements to your replacement panel and carefully cut it to size using a sharp utility knife or a vinyl siding cutter. A straight edge or guide is highly recommended for clean, precise cuts. Remember to make your cuts slightly larger than the measurements to allow for a snug fit. Overlapping the panels correctly will create a seamless look and protect your house from the elements.
Installing New Panels
Once the replacement panel is cut to size, carefully align it with the surrounding panels, ensuring proper overlap and alignment. Begin by snapping the bottom edge of the new panel into place. Gradually work your way up, ensuring the panel is flush against the underlying structure. Use appropriate fasteners such as galvanized nails or screws designed for vinyl siding. Avoid over-driving the fasteners, as this can damage the siding. For nails, the recommended distance from the edge is approximately 1 inch. Spacing between fasteners should be evenly distributed across the length of the panel to ensure secure attachment. Once all panels are securely in place, inspect the repair to ensure proper alignment and that there are no gaps or loose areas. Finally, ensure that all panels are properly interlocked and sitting flush with one another for a seamless and professional finish.
Addressing Larger Issues
When dealing with vinyl siding, some problems are beyond a simple DIY fix. Knowing when to call in a professional is crucial to avoid further damage and potential safety hazards. This section will discuss situations demanding professional intervention and highlight the differences between DIY and professional repairs.
Larger issues with vinyl siding often involve extensive damage, signs of water intrusion, or problems related to the underlying structure of your home. These issues require specialized tools, experience, and knowledge to address effectively and safely. Ignoring them can lead to costly repairs down the line, potentially impacting the structural integrity of your home.
Severe Damage Assessment
Severe damage, such as significant sections of siding ripped away by storms or extensive cracking across multiple panels, isn’t something easily tackled with basic DIY tools. The extent of the damage often requires a professional assessment to determine the underlying cause and the best repair strategy. This might involve inspecting for structural damage to the house itself, which could require the services of a structural engineer or contractor. For example, a severe storm might have not only ripped off siding but also compromised the sheathing underneath, requiring replacement and potentially even repairs to the framing. A professional can identify these hidden issues and provide a comprehensive repair plan.
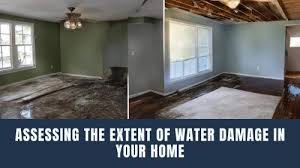
Water Intrusion and its Consequences
Water intrusion behind vinyl siding is a serious concern. While minor leaks might be manageable with DIY solutions, widespread water damage often indicates a larger problem, such as faulty flashing, damaged seals around windows and doors, or even roof leaks. Prolonged exposure to moisture can lead to rot, mold growth, and structural damage. A professional can pinpoint the source of the leak, address the underlying issue, and properly repair the siding to prevent future water damage. They have the expertise to assess the extent of the damage and ensure proper drying and remediation techniques are used to prevent mold growth. For instance, a poorly sealed window might seem like a small issue, but over time, the constant seepage can cause extensive damage to the wall framing and insulation, requiring significant repairs beyond just replacing the siding.
Structural Issues and Siding Repair
Sometimes, problems with the vinyl siding are symptomatic of deeper structural issues. For example, foundation settling or shifting can cause stress on the siding, leading to cracking and warping. Addressing the siding alone without addressing the underlying structural problem is a waste of time and money; the problem will simply reappear. A professional will be able to diagnose the structural issue and recommend appropriate solutions, which might involve foundation repair or other specialized work. A DIY approach would be inappropriate and potentially dangerous in this scenario. Imagine trying to repair cracked siding caused by foundation settling – the cracks would likely reappear unless the foundation issue is resolved first.
DIY vs. Professional Repairs: A Comparison
The decision to tackle siding repairs yourself or hire a professional depends largely on the extent of the damage and your DIY skills and comfort level. Minor repairs, like replacing a single damaged panel, are often manageable for homeowners with basic DIY skills. However, extensive damage, water intrusion, or suspected structural problems require the expertise of a professional. Attempting a complex repair without the necessary knowledge and tools can lead to further damage, increased costs, and potentially unsafe conditions. For example, working at heights to repair significant siding damage can be dangerous without proper safety equipment and training.
Safety Hazards in Major Siding Repairs
Working at heights is a significant safety hazard associated with major siding repairs. Falls can result in serious injury or even death. Improper handling of tools and materials can also lead to accidents. Furthermore, working with moisture-damaged materials can expose you to mold and other health hazards. Professionals are equipped with the necessary safety gear, training, and experience to minimize these risks. They will use proper scaffolding, harnesses, and other safety equipment to ensure a safe working environment. This minimizes the risk of accidents and protects both the workers and the property.
Preventative Maintenance
Keeping your vinyl siding looking its best and extending its lifespan requires regular cleaning and maintenance. Neglecting this can lead to premature damage, requiring costly repairs down the line. A proactive approach saves you time, money, and frustration.
Regular cleaning removes dirt, grime, and mildew that can dull the appearance of your siding and even cause damage over time. Inspections help you catch small problems before they become big ones, allowing for timely and less-expensive repairs. Think of it like regular car maintenance – small investments prevent major breakdowns.
Cleaning Schedule and Inspection Intervals
A simple schedule ensures your siding stays in top condition. Aim to clean your siding at least twice a year, in spring and fall. This removes accumulated dirt and debris from the winter and summer months. More frequent cleaning may be necessary depending on your location (e.g., areas with heavy pollen or near trees) and environmental factors. A thorough inspection should be performed during each cleaning, looking for any signs of damage. Yearly, more comprehensive inspections are advisable to check for underlying issues.
Vinyl Siding Cleaning Techniques
Proper cleaning techniques are crucial to avoid damaging your siding. Avoid harsh chemicals and abrasive cleaners that can scratch or discolor the surface. Gentle methods are most effective and prevent unnecessary wear and tear.
| Cleaning Method | Tools Needed | Application | Precautions |
|---|---|---|---|
| Soft Wash | Garden hose with adjustable nozzle, soft-bristled brush, mild detergent (e.g., dish soap), bucket | Mix mild detergent with water in a bucket. Apply solution to siding with brush, scrubbing gently. Rinse thoroughly with hose. | Avoid high-pressure washing, which can damage siding. Work in sections, rinsing frequently. Don’t scrub too hard. |
| Pressure Washing (Low Pressure Only) | Pressure washer with low-pressure nozzle, safety glasses, protective clothing | Use a low-pressure setting (ideally below 1500 PSI). Keep the nozzle at least a foot away from the siding and move it constantly to prevent concentrated water pressure. | Never use a high-pressure nozzle directly on the siding. Test in an inconspicuous area first. Always wear safety glasses and protective clothing. |
| Simple Hose Rinse | Garden hose with adjustable nozzle | Use a gentle spray setting to remove loose dirt and debris. | Ensure you have adequate water pressure to effectively remove dirt and grime. |
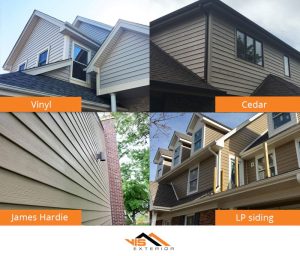
Choosing the Right Materials
Picking the right vinyl siding replacement panels is crucial for a successful repair and a long-lasting, attractive exterior. The wrong choice can lead to further damage or an inconsistent look, undermining your efforts. Consider several key factors to ensure you select siding that meets your needs and complements your home’s style.
Choosing the right vinyl siding involves considering several key factors, primarily focusing on durability, aesthetics, and cost-effectiveness. The ideal choice balances these factors to ensure a successful and visually appealing repair.
Vinyl Siding Types and Their Properties
Different types of vinyl siding offer varying levels of durability, color options, and cost. Understanding these differences is essential for making an informed decision. For instance, thicker panels generally offer superior durability and resistance to impact, but they also come with a higher price tag. Conversely, thinner panels are more budget-friendly but might be more susceptible to damage. The choice often depends on the specific needs of the repair and the homeowner’s budget.
- Standard Vinyl Siding: This is the most common and affordable type. It offers a good balance of durability and cost, making it suitable for many repair projects. Its color options are typically wide-ranging but may not be as extensive as some higher-end options.
- Premium Vinyl Siding: This type often features thicker panels and enhanced UV protection, resulting in increased durability and color retention. It’s more expensive than standard vinyl but offers a longer lifespan and better resistance to fading and damage.
- Insulated Vinyl Siding: This option incorporates a foam backing, providing additional insulation and energy efficiency. While more costly than standard siding, the long-term energy savings can offset the higher initial investment. It’s a particularly good choice for areas with extreme temperatures.
Matching Existing Siding
Maintaining a consistent appearance is vital when replacing sections of vinyl siding. Precise color matching is often the most challenging aspect of the repair process. To ensure a seamless blend, it’s crucial to carefully examine the existing siding to determine its exact color and texture. Slight color variations can be noticeable, especially in direct sunlight.
Several strategies can help achieve a perfect match:
- Obtain a sample: If possible, remove a small, inconspicuous section of undamaged siding to use as a reference when selecting a replacement panel. This allows for a direct comparison under various lighting conditions.
- Use the manufacturer’s color code: Most vinyl siding manufacturers provide color codes for their products. If you can identify the code on your existing siding, it simplifies the selection process significantly. This code will help you find an exact match.
- Consult a professional: If you’re struggling to match the color, a professional contractor experienced in vinyl siding repair can provide expert assistance and access to a wider range of options.
Cost Considerations
The cost of vinyl siding varies significantly depending on the type, thickness, and manufacturer. Premium vinyl siding with enhanced features will naturally be more expensive than standard options. It is important to factor in not only the cost of the siding itself but also the cost of labor if you’re hiring a contractor for installation. Comparing prices from multiple suppliers can help you find the best value for your money. For example, a homeowner replacing a small section might find that the cost difference between standard and premium vinyl is minimal, while a large-scale replacement project might necessitate a more careful evaluation of cost-effectiveness.
Tools and Equipment: How To Fix Vinyl Siding
Having the right tools makes vinyl siding repair much easier and safer. The wrong tools can lead to damage, frustration, and potentially injury. This section articles the essential tools you’ll need, categorized for clarity.
Gathering your tools beforehand ensures a smooth and efficient repair process. Remember to always check your tools for damage or wear before starting any project, replacing anything that’s questionable.
Measuring Tools
Accurate measurements are crucial for ensuring a proper fit when replacing damaged siding sections. Inaccurate measurements can lead to gaps or overlaps, compromising the aesthetic appeal and weatherproofing of your siding.
- Measuring Tape: A standard 25-foot tape measure is ideal for accurately measuring the length and width of damaged areas and replacement pieces.
- Level: A level ensures that new siding sections are installed straight and aligned with existing sections. This prevents unsightly unevenness and potential water damage.
- Square: A speed square or combination square helps ensure accurate cuts, particularly when working with angles.
Cutting Tools
Cutting vinyl siding requires precision to avoid damaging the material. Using the correct tools and techniques minimizes the risk of chipping or cracking the siding.
- Utility Knife: A sharp utility knife with fresh blades is suitable for cutting vinyl siding, especially for smaller repairs. Always use a new blade to ensure a clean cut.
- Jigsaw: A jigsaw with a fine-tooth blade is ideal for making curved or intricate cuts, especially when working around corners or windows.
- Circular Saw: For larger jobs or cutting multiple pieces, a circular saw with a fine-tooth blade can be more efficient. However, this requires extra care to avoid chipping.
Fastening Tools, How to fix vinyl siding
Securing the new siding requires the right fasteners and tools to ensure a durable and weather-resistant repair. Using the wrong fasteners can lead to loose siding and potential damage.
- Hammer: A claw hammer is needed for driving nails or staples into the siding. Choose a hammer with a smooth face to avoid marring the siding.
- Nail Gun (optional): A pneumatic or battery-powered nail gun can significantly speed up the installation process, especially for larger repair jobs. However, it requires proper training and safety precautions.
- Screwdriver (optional): Some siding systems use screws instead of nails. In these cases, a screwdriver with the appropriate bit is necessary.
Safety Equipment
Safety should always be the top priority when working with power tools. Taking necessary precautions prevents accidents and injuries.
- Safety Glasses: Protect your eyes from flying debris when cutting or hammering. Always wear safety glasses, even for seemingly minor tasks.
- Work Gloves: Protect your hands from cuts and splinters. Gloves also provide a better grip on tools.
- Hearing Protection: If using power tools like a nail gun or circular saw, wear hearing protection to prevent hearing damage from prolonged exposure to loud noise.
- Dust Mask: When cutting vinyl siding, fine particles can be released into the air. A dust mask protects your lungs from inhaling these particles.
Other Useful Tools
While not strictly essential, these tools can make the repair process easier and more efficient.
- Putty Knife: For cleaning up excess caulk or sealant.
- Caulk Gun: For applying caulk or sealant around the edges of new siding sections.
- Pry Bar: For carefully removing damaged sections of siding.
Outcome Summary
Source: sstatic.net
Fixing vinyl siding successfully involves a combination of careful assessment, appropriate repair techniques, and preventative maintenance. By understanding the different types of damage, you can determine the best course of action—whether it’s a simple DIY fix or a job best left to the professionals. Remember, regular cleaning and inspections are key to preventing larger, more costly problems down the line. With the right knowledge and tools, you can keep your home’s exterior looking great for years to come!
Comments are closed.