How Much to Replace Vinyl Siding with Brick?
How much to replace vinyl siding with brick? That’s a question many homeowners ask, and the answer isn’t a simple number. This upgrade significantly impacts your home’s curb appeal and value, but the cost depends on several factors. We’ll break down the expenses, from materials like clay, concrete, or manufactured stone brick, to labor costs and regional variations. Getting a clear picture of the process—from permit acquisition to choosing a reputable contractor—is crucial for a successful and budget-friendly transformation.
This guide dives into the nitty-gritty details of replacing your vinyl siding with brick, covering everything from initial planning and material selection to the step-by-step installation process and long-term maintenance. We’ll explore different brick types, installation methods, and design considerations to help you make informed decisions and achieve your dream home exterior.
Cost Factors Influencing Vinyl to Brick Siding Replacement
Switching from vinyl to brick siding is a significant home improvement project with a price tag that can vary considerably. Several key factors influence the overall cost, impacting your budget and timeline. Understanding these factors beforehand is crucial for planning and avoiding unexpected expenses.
Labor Costs for Vinyl Removal and Brick Installation
Labor costs represent a substantial portion of the total project expense. Removing existing vinyl siding involves careful work to avoid damaging the underlying sheathing. This includes detaching the siding panels, removing fasteners, and disposing of the waste materials responsibly. The complexity increases if there’s underlying damage needing repair. Brick installation, a more skilled and time-consuming process, includes preparing the wall surface, laying the bricks with mortar, and ensuring proper alignment and structural integrity. Expect to pay hourly rates for skilled laborers, which can range from $30 to $75 per hour, depending on location and experience. The total labor cost will depend on the size of your house and the complexity of the job. For example, a small bungalow might cost around $5,000-$10,000 in labor, while a large two-story house could easily exceed $20,000.
Material Costs for Different Brick Types
Brick comes in a wide variety of types, each impacting the overall cost. Clay bricks, a classic choice, offer durability and aesthetic appeal, but their cost can be higher than other options. Concrete bricks, a more affordable alternative, provide a similar look but may not have the same longevity. Manufactured stone, often a more cost-effective option for a brick-like appearance, is a good alternative for those seeking a balance of cost and aesthetics. Prices vary significantly based on the type, color, and texture of the brick. For example, a high-end clay brick might cost $10-$20 per square foot, while a standard concrete brick might cost $5-$10, and manufactured stone could range from $6-$15. Remember that these are estimates, and actual prices can fluctuate based on regional availability and supplier pricing.
Geographical Location’s Impact on Project Expenses
Geographic location significantly influences the overall project cost. Labor rates, material prices, and even permitting fees vary widely depending on your area. In regions with high labor costs and limited brick suppliers, the overall expense can be considerably higher. Conversely, areas with abundant local brickyards and lower labor costs may offer more competitive pricing. For instance, a project in a major metropolitan area like New York City would likely be significantly more expensive than a similar project in a rural area of the Midwest.
Cost Per Square Foot for Various Brick Types and Installation Methods
| Brick Type | Installation Method | Cost per Square Foot (USD) | Notes |
|---|---|---|---|
| Clay Brick | Standard | $15 – $30 | Higher-end options can exceed this range. |
| Concrete Brick | Standard | $8 – $15 | More affordable option. |
| Manufactured Stone | Standard | $10 – $20 | Cost varies greatly depending on quality and appearance. |
| Clay Brick | Complex (e.g., intricate patterns) | $25 – $40+ | Increased labor costs due to complexity. |
Project Planning and Preparation

Source: bbsiding.com
Replacing vinyl siding with brick is a significant undertaking requiring careful planning and preparation to ensure a smooth and successful project. This involves several key steps, from preparing your home to securing the necessary permits and choosing the right contractor. Proper planning minimizes potential delays and cost overruns.
Preparing your house for brick siding installation is crucial. This phase sets the stage for the rest of the project. Thorough preparation prevents unforeseen issues and helps ensure the final result meets your expectations.
House Preparation for Brick Installation
Before the bricklayers arrive, several preparations are necessary. This includes removing the existing vinyl siding, inspecting the underlying sheathing for damage, and addressing any necessary repairs. You’ll also need to protect landscaping and windows from damage during the construction process. For example, you might need to cover nearby plants with tarps and carefully mask window frames to prevent mortar splatters. Finally, ensure clear access to the house for the delivery of materials and equipment.
Obtaining Necessary Permits and Inspections
Securing the necessary building permits and scheduling inspections is a non-negotiable step. These permits ensure your project complies with local building codes and regulations. The specific permits required will vary depending on your location and the scope of the project. You’ll typically need to submit detailed plans and specifications to your local building department. Inspections will occur at various stages of construction to verify compliance with the approved plans. Failure to obtain permits can lead to hefty fines and even the need to tear down completed work. For example, a homeowner in California might need separate permits for demolition, structural work, and the brick installation itself.
Choosing a Reputable Contractor
Selecting a qualified and reputable contractor is paramount to the success of your project. Don’t rush this decision. Thoroughly research potential contractors, checking their licensing, insurance, and references. Look for contractors with proven experience in brick siding installation and a solid track record of completed projects. Online reviews and testimonials can provide valuable insights. Requesting several detailed bids and comparing them will help you determine a fair price. For instance, verifying a contractor’s license through your state’s contractor licensing board ensures they are legally operating and have met the required qualifications.
Project Planning Checklist
A comprehensive checklist helps maintain organization and minimizes the risk of overlooking critical steps. This checklist should be used as a guide and adapted to your specific project needs.
- Secure necessary building permits.
- Remove existing vinyl siding and inspect underlying sheathing.
- Repair any damage to the underlying structure.
- Obtain multiple bids from reputable contractors.
- Verify contractor’s license, insurance, and references.
- Establish a clear timeline and budget.
- Plan for material delivery and storage.
- Protect landscaping and windows from damage.
- Schedule regular inspections.
Brick Selection and Design Considerations
Choosing the right brick for your siding is a crucial step in transforming your home’s exterior. The color, texture, size, and laying pattern of the brick will significantly impact your home’s overall aesthetic appeal, curb value, and even its energy efficiency. Let’s explore the options and considerations involved.
Brick Color, Texture, and Size Variations and Their Aesthetic Impact
Brick comes in a vast array of colors, textures, and sizes, each offering a unique aesthetic. Traditional red brick provides a classic, timeless look, while lighter colors like beige or cream create a more modern and airy feel. Darker bricks, such as charcoal or brown, offer a dramatic and sophisticated appearance. Textures range from smooth and sleek to rough and rustic, influencing the overall feel of the home. Larger bricks can create a bold statement, while smaller bricks offer a more detailed and intricate look. Consider the architectural style of your home when selecting brick; a Victorian home might suit a richly textured, dark brick, while a contemporary home might be better suited to a sleek, light-colored brick. The surrounding landscape and neighborhood style should also be considered for cohesive aesthetics.
Advantages and Disadvantages of Various Brick Laying Patterns
The way bricks are laid significantly affects the final appearance. Common patterns include running bond (the simplest, with bricks laid in horizontal rows), common bond (with headers – bricks laid with their short ends showing – at intervals), English bond (alternating courses of headers and stretchers – bricks laid with their long sides showing), and Flemish bond (alternating headers and stretchers in each course). Running bond is cost-effective and creates a clean, simple look, while more complex patterns like Flemish bond add visual interest and can increase installation costs. Consider the style of your home and your budget when choosing a pattern. Complex patterns may be more labor-intensive, thus increasing the overall project cost. A simpler pattern can give a more modern and minimalist appearance.
Brick Siding Design Examples
Below are three distinct brick siding design examples for a typical single-story house, showcasing the versatility of brick in creating different styles. Estimated costs are approximate and will vary based on location, labor rates, and material sourcing.
| Brick Type | Pattern | Estimated Cost per sq ft | Description |
|---|---|---|---|
| Light Gray, Smooth Texture | Running Bond | $15 – $20 | Creates a clean, modern look. The light color reflects sunlight, potentially reducing cooling costs. |
| Dark Red, Textured | Flemish Bond | $20 – $25 | Adds visual interest and a classic, traditional feel. The dark color absorbs more heat. |
| Beige, Slightly Rough Texture | Stack Bond (bricks laid vertically) | $18 – $23 | Provides a contemporary and unique aesthetic. The beige color offers a neutral backdrop. |
Impact of Brick Choice on Home Insulation and Energy Efficiency
Brick is a naturally durable and relatively energy-efficient material. However, the color and texture of the brick can impact its thermal properties. Darker colored bricks absorb more heat, potentially increasing cooling costs in warmer climates, while lighter colors reflect sunlight and can reduce cooling loads. The type of brick and its installation method also play a role; proper installation with sufficient insulation behind the brick is crucial for optimal energy efficiency. Consider adding insulation during the replacement project to maximize energy savings. A well-insulated brick wall can significantly improve a home’s energy performance, reducing heating and cooling costs over the long term. For example, a home with properly insulated brick siding might see a 15-20% reduction in energy consumption compared to a home with poorly insulated siding. This translates to significant cost savings on utility bills annually.
The Installation Process
Source: treehouseinternetgroup.com
Replacing vinyl siding with brick is a significant undertaking, requiring careful planning and execution. This section details the step-by-step process, from removing the old siding to installing the new brick. Remember, safety is paramount; always wear appropriate safety gear and consider hiring professionals for complex tasks.
The entire process can be broken down into three main phases: removing the existing vinyl siding, preparing the house for brick installation, and finally, installing the brick itself. Each phase involves several crucial steps that, if not followed correctly, can compromise the final result and even create safety hazards.
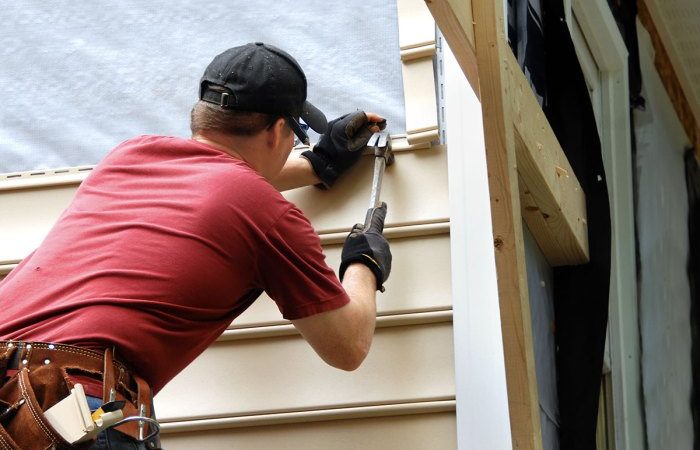
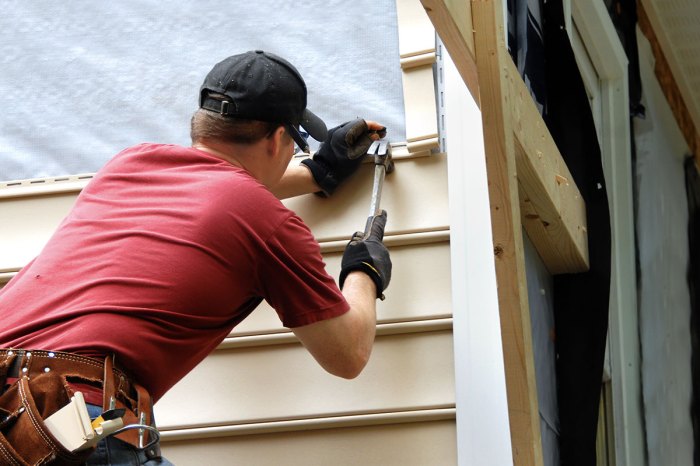
Vinyl Siding Removal
Removing the vinyl siding is the first step. This process involves systematically dismantling the siding panels, starting from the bottom and working your way up. Improper removal can damage the underlying sheathing, so proceed cautiously.
- Begin at the bottom of a wall section, carefully removing the bottom row of siding. Use a pry bar to gently lift the panels, being careful not to scratch the underlying wall.
- Once the bottom row is removed, continue working your way upwards, removing each row one at a time. The siding should come off relatively easily; if it’s stuck, carefully pry it loose.
- As you remove the siding, pay close attention to the fasteners. Note their placement and type for later reference during the brick installation. Remove any nails or staples that are loose or protruding.
- Once all the vinyl siding is removed, inspect the underlying sheathing for any damage. Repair any damaged areas before proceeding to the next step.
Exterior Wall Preparation, How much to replace vinyl siding with brick
Before installing the brick, the house’s exterior needs thorough preparation. This involves ensuring the structural integrity of the walls and creating a suitable base for the brick veneer. This is a crucial step to prevent future problems like water damage and cracking.
- Inspect the existing sheathing for damage or rot. Replace any damaged sections with new sheathing material. This ensures a solid and even surface for the brick.
- Install building paper or a waterproof membrane over the sheathing. This acts as a moisture barrier, protecting the wall from water damage. Overlap the paper sheets to ensure complete coverage and seal the edges with waterproof tape.
- If necessary, install furring strips to create an air gap between the sheathing and the brick veneer. This helps with ventilation and prevents moisture buildup.
- Ensure the surface is level and plumb. Use shims where necessary to ensure a consistent surface for the brick installation.
Brick Installation Methods
There are several methods for installing brick, each with its advantages and disadvantages. The choice of method depends on factors like the type of brick, the budget, and the desired aesthetic.
- Full-Bed Mortar: This traditional method involves applying a full bed of mortar to the entire back of each brick. It provides excellent adhesion and strength but is more labor-intensive and uses more mortar.
- Face-Shell Mortar: This method involves applying mortar only to the edges of the brick. It’s faster and uses less mortar, but it may not be as strong as the full-bed method. It’s often used for brick veneer installations.
- Brick Veneer Installation over Existing Siding (Not Recommended): Installing brick veneer directly over existing siding is generally not recommended. The additional weight and lack of proper ventilation can lead to moisture problems and structural issues. It’s best to remove the existing siding and prepare the wall properly before installing the brick veneer.
Maintenance and Long-Term Costs
Switching from vinyl to brick siding is a significant investment, and understanding the long-term maintenance and cost implications is crucial. While brick offers superior durability, it’s not entirely maintenance-free. Let’s explore the upkeep involved and compare it to the costs associated with vinyl siding over time.
Brick siding, while incredibly durable, requires occasional attention to maintain its beauty and structural integrity. Ignoring maintenance can lead to costly repairs down the line, so a proactive approach is best. Proper care will help your brick siding look its best and extend its lifespan considerably.
Brick Siding Cleaning and Maintenance
Regular cleaning is key to preventing dirt, grime, and mold buildup on your brick siding. A simple power washing once or twice a year, using a low-pressure setting to avoid damaging the mortar, is usually sufficient. For stubborn stains, a solution of mild detergent and water can be applied before rinsing. Avoid using harsh chemicals or abrasive cleaners, as these can damage the brick’s surface. Regular inspections for cracks, loose mortar, or damage from pests are also essential. Addressing minor issues promptly prevents them from escalating into larger, more expensive problems.
Potential for Future Repairs and Replacement Costs
While brick is exceptionally long-lasting, it’s not indestructible. Exposure to the elements, freeze-thaw cycles, and settling foundations can cause cracks in the mortar or even the bricks themselves. Repairing cracked mortar involves carefully removing the damaged sections and replacing them with fresh mortar that matches the existing color. Replacing damaged bricks requires more skill and is generally more expensive. In extreme cases, sections of siding might need to be entirely replaced. The cost of these repairs can vary greatly depending on the extent of the damage and the accessibility of the affected areas. For example, repairing a small crack in the mortar might cost a few hundred dollars, while replacing a significant portion of the siding could run into the thousands. A well-maintained brick façade, however, can easily last for 50 years or more with minimal repair needs.
Long-Term Maintenance Cost Comparison: Brick vs. Vinyl
Over the long term, brick siding generally requires less frequent and less expensive maintenance than vinyl. While vinyl siding might need occasional cleaning and the occasional repair of a damaged panel, brick requires less frequent intervention. However, when repairs are needed for brick, they tend to be more costly than vinyl repairs. Vinyl siding replacement is usually less expensive than brick replacement, especially for large areas. The upfront cost of brick is higher, but the long-term savings in maintenance can offset this initial investment, especially considering the lifespan difference. The true cost savings depend heavily on the specific climate and the quality of the initial installation. Consider factors like extreme weather conditions (frequent freeze-thaw cycles can accelerate deterioration), and the presence of pests or aggressive vegetation that can damage the mortar or brick.
Expected Maintenance Tasks and Costs
| Task | Frequency | Estimated Cost | Notes |
|---|---|---|---|
| Power washing | Annually or Biannually | $100 – $300 | Cost varies depending on house size and professional vs. DIY |
| Minor mortar repair | As needed | $50 – $500 per repair | Cost depends on the size and location of the damage |
| Brick replacement | As needed | $100 – $1000+ per brick | Highly variable, depending on the brick type, accessibility, and labor costs |
| Inspection for damage | Annually | $0 (DIY) or $100 – $200 (Professional) | Early detection of problems saves money in the long run |
Illustrative Examples of Brick Siding Transformations
Transforming a home’s exterior with brick siding can dramatically enhance its curb appeal and value. Let’s look at three diverse examples showcasing the potential of this upgrade, highlighting the cost and the resulting impact on property value. Remember that costs can vary significantly based on location, labor rates, and material choices.
Ranch-Style Home Transformation
Imagine a modest 1960s ranch-style home clad in dated beige vinyl siding. The before image shows a somewhat bland facade, lacking architectural detail. The homeowners opted for a warm, reddish-brown brick, a common and relatively affordable choice. The transformation process involved removing the old vinyl, preparing the underlying structure, and then installing the new brick veneer. This particular project involved approximately 500 square feet of siding. The brick chosen was a standard clay brick, offering a classic and timeless aesthetic. The after image reveals a significant improvement. The warm brick tones complement the home’s architecture, giving it a more substantial and inviting look. The overall cost, including labor and materials, was approximately $15,000. Real estate agents in the area estimated that this upgrade increased the home’s value by at least $20,000.
Victorian-Style Home Upgrade
Next, consider a Victorian-era home with intricate detailing, originally covered in vinyl siding that obscured its architectural features. The before image shows the vinyl siding hiding the home’s beautiful trim and decorative elements. The homeowners chose a more nuanced approach, selecting a blend of light and dark bricks to highlight the home’s architectural details. This project involved approximately 800 square feet of siding and included careful brickwork around the windows and intricate trim. The brick used was a multi-toned blend, offering visual interest and enhancing the home’s Victorian character. The after image showcases a stunning transformation. The brickwork accentuates the home’s original architectural details, restoring its grandeur. This project, due to its complexity and the specialized labor required, cost approximately $30,000. The resulting increase in property value was estimated at around $40,000 to $50,000, reflecting the significant enhancement to the home’s aesthetic appeal.
Modern Farmhouse Makeover
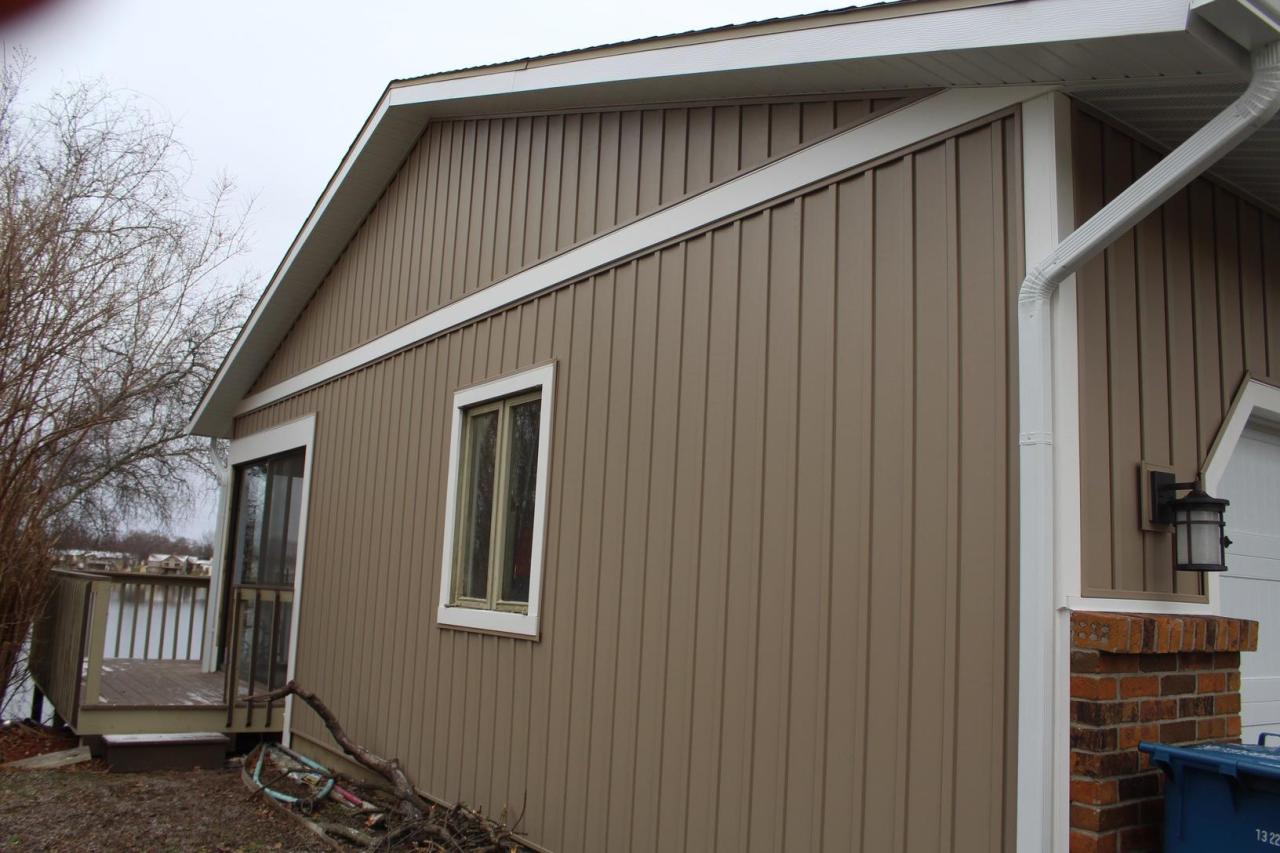
Finally, let’s examine a modern farmhouse. The before image shows a fairly new home with plain white vinyl siding. While modern, it lacked the warmth and texture often associated with farmhouse style. The homeowners chose a light gray brick, providing a clean, contemporary feel that still offered texture and visual interest. This project, involving about 700 square feet of siding, utilized a relatively quick and efficient installation method, due to the straightforward design of the house. The after image displays a sophisticated and updated exterior. The light gray brick complements the home’s modern design while adding a touch of rustic charm. The cost for this project was approximately $22,000, and real estate professionals estimated a value increase of around $25,000 to $30,000.
Conclusion: How Much To Replace Vinyl Siding With Brick
Source: centuryspouting.com
Transforming your home’s exterior with brick siding is a significant investment, but the results—enhanced curb appeal, increased home value, and improved energy efficiency—often outweigh the costs. By carefully considering the factors we’ve discussed, from material choices and labor costs to long-term maintenance, you can plan a project that fits your budget and achieves your aesthetic goals. Remember to choose a reputable contractor, obtain necessary permits, and meticulously plan each step for a smooth and successful renovation.
Comments are closed.