House Siding Repair A Comprehensive Guide
House siding repair isn’t just about patching holes; it’s about protecting your home’s exterior and preserving its value. This guide dives into the world of siding, from understanding the different materials and identifying damage to tackling repairs yourself or hiring a professional. We’ll cover everything from minor fixes to complete replacements, helping you keep your home’s exterior looking its best and lasting for years to come.
We’ll explore common siding types like vinyl, wood, fiber cement, and aluminum, comparing their pros and cons regarding durability, maintenance, and cost. Learning to spot early signs of damage, like cracks, warping, or discoloration, is key to preventing more extensive and costly repairs down the line. We’ll also detail the step-by-step process for various repairs, from patching small holes to replacing entire panels, along with crucial safety tips. Finally, we’ll help you navigate the process of hiring a contractor, ensuring you get the best value for your money.
Types of House Siding

Choosing the right siding for your home is a crucial decision impacting both its aesthetics and longevity. The material you select will significantly influence maintenance needs, lifespan, and overall cost. Understanding the properties of different siding types is key to making an informed choice.
Common House Siding Materials
Several materials are commonly used for house siding, each offering a unique blend of advantages and disadvantages. Let’s explore some of the most popular options.
Vinyl Siding
Vinyl siding is a popular choice due to its affordability and low maintenance. It’s relatively easy to install and comes in a wide variety of colors and styles to mimic the look of wood or other materials. However, vinyl can be susceptible to damage from impact, and extreme temperature fluctuations can cause it to warp or crack. It also doesn’t offer the same insulation value as some other siding options.
Wood Siding
Wood siding, while more expensive than vinyl, offers a classic and aesthetically pleasing look. It’s a durable material that can last for many years with proper maintenance, including regular painting or staining to protect it from the elements. However, wood siding requires more upkeep than vinyl and is susceptible to rot, insect infestation, and damage from moisture. Different types of wood, such as cedar or redwood, offer varying levels of durability and resistance to decay.
Fiber Cement Siding
Fiber cement siding combines the durability of cement with the workability of wood fibers. It’s highly resistant to fire, insects, and moisture, making it a long-lasting and low-maintenance option. Fiber cement siding is more expensive than vinyl but less expensive than some wood options. It can also be painted to match your home’s aesthetic. However, it’s heavier than vinyl and requires professional installation.
Aluminum Siding
Aluminum siding is lightweight, durable, and resistant to fire and insects. It’s also relatively low-maintenance and easy to clean. However, it can dent easily and may not offer the same insulation value as other materials. Its metallic appearance might not appeal to everyone, although advancements have led to more textured and aesthetically pleasing options.
Siding Material Comparison
The table below summarizes the lifespan and maintenance requirements of the different siding materials discussed. Keep in mind that these are estimates, and actual lifespan can vary based on factors such as climate, installation quality, and maintenance practices.
| Siding Type | Lifespan (Years) | Maintenance Requirements | Cost (Relative) |
|---|---|---|---|
| Vinyl | 20-40 | Low; occasional cleaning | Low |
| Wood | 30-50+ (depending on wood type and maintenance) | Moderate to High; regular painting/staining | Medium to High |
| Fiber Cement | 50-80+ | Low; occasional cleaning | Medium to High |
| Aluminum | 30-50 | Low; occasional cleaning | Medium |
Identifying Siding Damage
Spotting siding problems early can save you a lot of money and hassle down the line. Regular inspections are key to preventing small issues from becoming major, costly repairs. Knowing what to look for is the first step in maintaining your home’s exterior.
Knowing the signs of siding damage is crucial for timely repairs. Various factors, including weather and age, contribute to deterioration. Early detection helps prevent further damage and protects your home’s structure.
Cracks and Holes
Cracks and holes in your siding are common signs of damage. These can range from tiny hairline fractures to large gaps. Smaller cracks might indicate settling of the house or simple wear and tear, while larger holes often result from impact damage, such as a flying object or animal activity. For example, a small crack in vinyl siding might simply be a cosmetic issue, easily repaired with caulk. However, a large hole in wood siding, perhaps caused by a branch falling during a storm, requires more extensive repair, potentially involving replacing the damaged section. The image below depicts a cracked section of wood siding, with the crack running vertically along a single board. The cause is likely age and weathering, resulting in the wood drying and shrinking. The crack shows signs of water penetration, indicating the need for repair to prevent further damage.
Warping and Buckling
Warping and buckling are signs of moisture damage or extreme temperature changes. Wood siding is particularly susceptible, often swelling with moisture and then warping as it dries. Vinyl siding can also buckle, though this is usually due to improper installation or extreme temperature fluctuations. Imagine a section of wood siding that has visibly bowed outward. This buckling is likely due to prolonged exposure to moisture, causing the wood to expand and then warp as it dries. The image depicts this, showing a pronounced curve in several planks of wood siding. This requires attention to address both the cosmetic issue and the potential for water intrusion. Similarly, vinyl siding might buckle in hot weather if it wasn’t properly installed to allow for expansion and contraction.
Discoloration and Fading
Discoloration and fading are common signs of aging and sun exposure. Prolonged sun exposure can cause paint or stain to fade, and even the siding material itself to lose its vibrancy. Mold and mildew can also cause discoloration, particularly in areas with poor ventilation or excessive moisture. For instance, a noticeable darkening or streaking on the lower portion of the siding might indicate mold growth due to water accumulation from rain or sprinklers. The image illustrates this, showing a noticeable dark green discoloration along the bottom of the siding. This discoloration indicates potential moisture problems that need addressing to prevent further deterioration.
Repairing Damaged Siding
Repairing damaged house siding can significantly improve your home’s curb appeal and protect it from the elements. Whether it’s a small crack or a completely damaged panel, addressing the issue promptly prevents further damage and saves you money in the long run. This section details the process of repairing minor siding damage and replacing damaged panels. Remember to always prioritize safety and use appropriate personal protective equipment (PPE).
Patching Small Holes and Cracks
Minor damage like small holes or cracks can often be repaired with patching compounds specifically designed for your siding material. For example, vinyl siding often requires a flexible caulk, while wood siding might benefit from a wood filler. The key is to choose a patching material that matches the color and texture of your siding as closely as possible for a seamless repair.
- Clean the damaged area thoroughly, removing any loose debris or old caulk. This ensures proper adhesion of the patching material.
- Apply the patching compound, following the manufacturer’s instructions. Use a putty knife or similar tool to smooth the surface and ensure an even application. For larger cracks, you may need to reinforce the area with a mesh backing before applying the compound.
- Allow the patching compound to dry completely. This drying time will vary depending on the product and environmental conditions.
- Once dry, lightly sand the patched area to smooth any imperfections and blend it with the surrounding siding.
- Finally, touch up the repaired area with paint or a siding stain that matches your existing siding color. This will ensure the repair is virtually invisible.
Replacing Damaged Siding Panels
Replacing a damaged siding panel is a more involved process than patching, but it’s often necessary for significant damage. This requires careful removal of the damaged panel and precise installation of a replacement. Always ensure you have enough replacement panels to match the existing siding, taking into account any subtle color variations. You’ll need tools like a pry bar, hammer, utility knife, and measuring tape.
- Carefully remove the damaged siding panel. Start by gently prying the panel away from the surrounding panels using a pry bar. Work slowly and methodically to avoid damaging adjacent panels. Remember to note the orientation of the panel for proper reinstallation.
- Inspect the underlying sheathing or wall for any further damage. Repair any damage to the underlying structure before installing the replacement panel.
- Measure the replacement panel to ensure it is the correct size and shape to fit the opening. If necessary, make any minor adjustments using a utility knife or saw.
- Install the new siding panel, ensuring it is properly aligned with the surrounding panels and securely fastened using appropriate nails or screws. Remember to follow the manufacturer’s instructions for installation.
- Caulk around the edges of the new panel to seal it against moisture and air infiltration. Choose a caulk that is compatible with your siding material.
Safety Precautions During Siding Repair
Working at heights presents inherent risks. Always use appropriate safety equipment such as a sturdy ladder, safety harness, and work gloves. If working on a roof or high above ground, employ proper fall protection measures. Wear eye protection to shield your eyes from flying debris. When using power tools, always follow manufacturer safety guidelines. Never work on wet or icy surfaces. Finally, be mindful of power lines and electrical hazards when working near your home’s exterior.
Siding Maintenance and Prevention
Proactive siding maintenance is key to preserving your home’s curb appeal and protecting its structure. Regular care significantly extends the lifespan of your siding, preventing costly repairs down the line. By understanding your siding material and implementing a simple maintenance routine, you can avoid many common problems.
Proper maintenance involves more than just occasional cleaning; it encompasses preventative measures that address the root causes of siding damage. This includes regular inspections, timely repairs, and strategies to minimize exposure to the elements. This approach not only saves money in the long run but also ensures your home remains structurally sound and aesthetically pleasing.
Preventative Measures to Extend Siding Lifespan
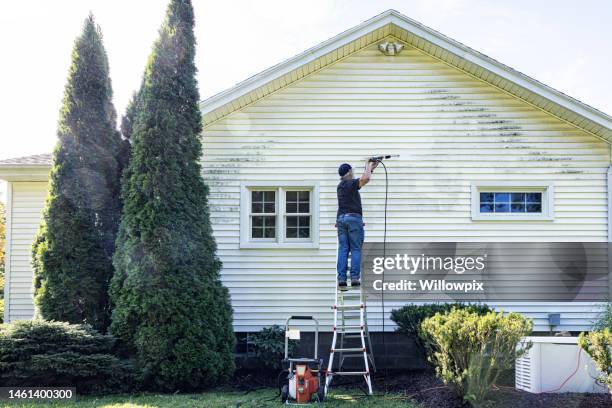
Regular cleaning is the cornerstone of siding maintenance. Dirt, mildew, and algae not only detract from the appearance of your home but also contribute to deterioration. For most siding types, a yearly cleaning with a pressure washer (using a low-pressure setting to avoid damage) and a mild detergent solution is sufficient. Pay close attention to areas prone to mildew buildup, such as shaded areas or corners. For stubborn stains, a solution of bleach and water (always follow product instructions carefully) can be effective, but be mindful of potential damage to certain siding materials. After cleaning, allow the siding to dry completely. Regular caulking around windows, doors, and other areas where siding meets other building components is crucial to prevent water intrusion. Cracked or missing caulk should be replaced promptly to maintain a watertight seal.
The Importance of Proper Ventilation
Adequate ventilation is crucial for preventing moisture buildup within the walls of your home. Moisture trapped behind the siding can lead to rot, mold growth, and structural damage. Ensure your home has sufficient soffit and gable vents to allow for proper air circulation. Inspect these vents regularly to ensure they are not obstructed by debris. Consider adding additional ventilation if necessary, especially in areas with high humidity. Proper attic ventilation is also essential to prevent moisture from condensing on the underside of the roof and dripping down behind the siding. This can be achieved through the installation of ridge vents, soffit vents, and gable vents, ensuring a balanced airflow. In older homes, improving attic ventilation may require professional assistance.
Regular Maintenance Checklist
Regular maintenance varies depending on the siding material. Here’s a checklist to guide you:
- Vinyl Siding: Inspect for cracks, dents, or loose pieces. Clean annually with a pressure washer and mild detergent. Replace damaged sections promptly. Caulk around windows and doors as needed.
- Wood Siding: Inspect for rot, insect damage, and loose boards. Clean annually with a mild detergent solution. Repaint or stain every few years, depending on the condition and type of finish. Address any rot or insect infestation immediately.
- Fiber Cement Siding: Inspect for cracks and damage. Clean annually with a pressure washer and mild detergent. Repair cracks using appropriate patching compound. This material is generally very durable and requires minimal maintenance.
- Aluminum Siding: Inspect for dents, scratches, and loose panels. Clean annually with a mild detergent and water solution. Repair or replace damaged sections as needed.
Remember that this is a general guideline. Always consult the manufacturer’s recommendations for specific maintenance instructions for your siding material. Addressing minor issues promptly will prevent them from escalating into more significant and costly problems.
Cost Considerations for Repairs
Repairing or replacing your house siding can be a significant expense, varying greatly depending on the extent of the damage, the type of siding, and your location. Understanding the cost breakdown will help you budget effectively and make informed decisions about your home’s exterior. This section will discuss typical costs associated with different repair methods and compare the cost-effectiveness of repair versus full replacement.
Repair Costs by Method
Several factors influence the cost of siding repair. Labor costs, material costs, and the complexity of the repair all play a role. For instance, a simple crack repair might only require a small tube of sealant and a few minutes of your time, while replacing a large section of damaged siding could involve significant labor and material expenses.
Repair vs. Replacement Cost-Effectiveness
Repairing damaged siding is often more cost-effective than complete replacement, especially for minor issues like small cracks or loose panels. However, if extensive damage exists, such as widespread rot, insect infestation, or severe storm damage, replacing the siding might be a more financially sound and long-term solution, preventing further, more costly problems down the line. A thorough assessment of the damage is crucial in determining the most economical approach. For example, repairing individual sections of vinyl siding damaged by hail might cost a few hundred dollars, while replacing the entire siding might cost tens of thousands.
Estimated Costs for Various Repair Scenarios, House Siding Repair
The following table provides estimated costs for various siding repair scenarios. Keep in mind that these are averages and actual costs can vary based on location, labor rates, material costs, and the complexity of the repair. Always obtain multiple quotes from reputable contractors before making any decisions.
| Repair Scenario | Material Cost (USD) | Labor Cost (USD) | Total Estimated Cost (USD) |
|---|---|---|---|
| Small crack repair (vinyl siding) | $5 – $20 | $25 – $75 | $30 – $95 |
| Repairing a loose or damaged shingle (wood or asphalt) | $10 – $50 | $50 – $150 | $60 – $200 |
| Replacing a single damaged vinyl siding panel | $20 – $50 | $75 – $150 | $95 – $200 |
| Replacing a section of damaged wood siding (approx. 4ft x 8ft) | $200 – $500 | $300 – $800 | $500 – $1300 |
Hiring a Contractor for Siding Repair: House Siding Repair
Finding the right contractor for your siding repair is crucial for a successful and long-lasting fix. A poorly chosen contractor can lead to shoddy workmanship, cost overruns, and even further damage to your home. Taking the time to thoroughly vet potential contractors will save you headaches and money in the long run.
Selecting a qualified and reputable contractor involves several key steps. First, you need to gather referrals and check online reviews. Look for contractors with consistent positive feedback and a proven track record of quality work. Licensing and insurance are also essential; verify that the contractor holds the necessary licenses and carries adequate liability and workers’ compensation insurance to protect you from potential problems. Finally, don’t hesitate to ask for references and contact previous clients to inquire about their experiences.
Contractor Quote Considerations
Obtaining quotes from multiple contractors is a vital step in the process. Before requesting quotes, ensure you provide each contractor with a detailed description of the work needed, including specific measurements and materials. This will ensure you receive accurate and comparable bids. Consider factors beyond just the price, such as the contractor’s experience, proposed timeline, and warranty offered. A lower price might be tempting, but it could come with hidden costs or inferior materials. Also, ask for a detailed breakdown of the costs involved, including labor, materials, and any permits.
Evaluating Contractor Bids and Identifying Red Flags
Comparing contractor bids requires careful attention to detail. Don’t just focus on the bottom line; compare the scope of work, materials specified, and the warranty offered. Be wary of bids that are significantly lower than others; this could indicate a compromise on quality or hidden costs later. Red flags to watch out for include vague or incomplete contracts, a lack of licensing or insurance, pressure to sign quickly, and unwillingness to answer your questions thoroughly. A reputable contractor will be transparent about their process, materials, and costs. For example, a bid that only lists “siding repair” without specifying materials or labor hours is a major red flag. A detailed bid might specify, for instance, “Replacement of 100 sq ft of damaged cedar siding with matching grade A cedar planks, including labor, disposal of old materials, and necessary fasteners; $X.” This level of detail shows professionalism and transparency.
Epilogue
Maintaining your home’s siding is a crucial aspect of homeownership. By understanding the different types of siding, identifying damage early, and knowing when to repair or replace, you can significantly extend the life of your home’s exterior and maintain its curb appeal. Whether you’re a DIY enthusiast or prefer to hire a professional, this guide has provided you with the knowledge and resources to make informed decisions about your house siding repair needs. Remember, regular maintenance and preventative measures are key to avoiding costly repairs in the future.
Comments are closed.