Fiberon Decking Installation A Complete Guide
Fiberon decking installation might seem daunting, but with the right knowledge and approach, building your dream deck becomes achievable. This guide walks you through each step, from planning and preparation to finishing touches and troubleshooting. We’ll cover choosing the right Fiberon decking material, mastering the installation techniques, and ensuring your deck is both beautiful and durable. Get ready to transform your outdoor space!
We’ll explore the various Fiberon decking options, comparing their durability, maintenance needs, and overall cost-effectiveness. We’ll then delve into the practical aspects of installation, providing detailed instructions and diagrams to guide you through framing, joist installation, and securing the decking boards. Finally, we’ll cover essential safety precautions and address common installation problems to ensure a smooth and successful project.
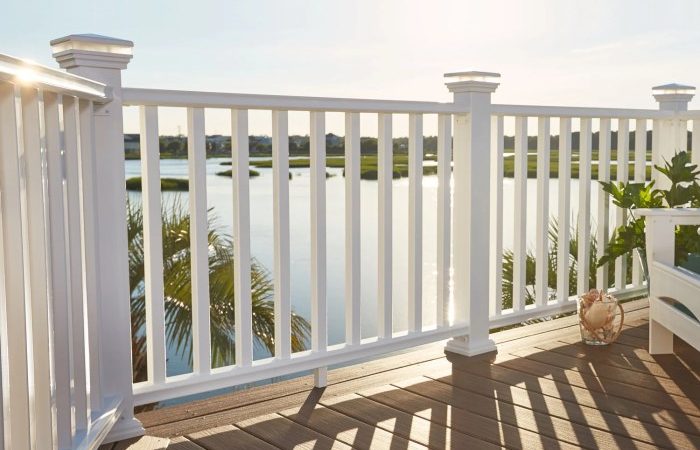
Understanding Fiberon Decking Materials
Source: lawnartists.com
Fiberon offers a range of composite decking materials designed for durability and low-maintenance outdoor living. Understanding the differences between their product lines is crucial for choosing the best option for your project, considering factors like budget, desired aesthetic, and expected lifespan.
Fiberon Decking Material Types and Properties
Fiberon produces several decking lines, each with unique characteristics. Their flagship lines often include variations within the line itself, offering choices in color, texture, and even wood grain patterns. These differences impact the overall look and feel of the finished deck. For example, some lines might mimic the look of real wood more closely than others, while others prioritize a more modern, sleek appearance. The composition of each line also varies, influencing durability and maintenance needs.
Durability and Maintenance of Fiberon Decking Lines
The durability and maintenance requirements of Fiberon decking vary significantly across their product lines. Generally, their higher-end lines boast greater resistance to fading, staining, and scratching. This translates to less frequent cleaning and a longer lifespan before significant repairs or replacements are needed. Lower-cost options might require more regular cleaning and may show signs of wear more quickly. Specific warranties offered by Fiberon also reflect the expected durability of each product line. For instance, a longer warranty period usually suggests greater confidence in the material’s longevity.
Advantages and Disadvantages of Fiberon Decking
Compared to other decking materials, Fiberon offers several key advantages. Its composite nature provides inherent resistance to rot, insect damage, and splintering, unlike natural wood. It typically requires less maintenance than wood, saving time and effort over the deck’s lifespan. Furthermore, Fiberon decking comes in a wide variety of styles and colors, offering greater design flexibility than traditional wood.
However, Fiberon decking also has some disadvantages. It can be more expensive upfront than pressure-treated lumber. While relatively low-maintenance, it still requires occasional cleaning to maintain its appearance. Finally, the composite material may not feel exactly like real wood underfoot, a factor some homeowners consider.
Fiberon Decking Material Comparison
| Material Name | Composition | Durability | Maintenance |
|---|---|---|---|
| Fiberon Horizon | Composite (PVC and wood fiber) | High; resists fading, staining, and scratching | Low; occasional cleaning |
| Fiberon GoodLife | Composite (PVC and wood fiber) | Medium; moderate resistance to fading and scratching | Medium; regular cleaning recommended |
| Fiberon ArmorTech | Composite (PVC and wood fiber, with added protection) | High; enhanced resistance to scratches and stains | Low; minimal cleaning needed |
| Fiberon Legacy | Composite (PVC and wood fiber) | Medium-High; good resistance to fading and weathering | Low to Medium; periodic cleaning |
Planning and Preparation for Installation
Laying a solid foundation for your Fiberon deck is crucial for its longevity and aesthetic appeal. Proper planning and preparation will save you time, effort, and potential headaches down the line. This section outlines the necessary steps to ensure a successful installation.
Necessary Tools and Equipment
Gathering the right tools beforehand is essential for a smooth installation. Having everything readily available prevents delays and ensures efficient workflow. A well-stocked toolbox will significantly improve the overall process.
- Measuring tape: A long, accurate tape measure is vital for precise measurements of the decking area and individual boards.
- Level: A reliable level, preferably a 4-foot level, is necessary to ensure a perfectly level deck surface. A laser level can also greatly increase accuracy and speed.
- Circular saw or miter saw: These saws are used for cutting Fiberon decking boards to the required lengths and angles.
- Drill with various drill bits: You’ll need a drill to pre-drill holes for screws and fasteners. Different sized bits are necessary for different applications.
- Impact driver: An impact driver provides the torque needed to drive screws efficiently and prevents stripping.
- Safety glasses and gloves: Essential for protecting your eyes and hands from debris and potential injuries.
- Post hole digger or auger: For setting posts in the ground, a post hole digger or auger is necessary for creating accurately sized holes.
- Hammer: A claw hammer can be helpful for various tasks, such as tapping boards into place.
- Speed square: A speed square is useful for marking accurate cuts, particularly for angled cuts.
- Clamps: Clamps help hold boards in place while securing fasteners.
Measuring and Preparing the Decking Area
Accurate measurements are fundamental to a successful deck installation. This involves more than simply determining the overall dimensions; it requires careful consideration of obstacles and potential challenges.
- Clear the area: Remove any existing structures, vegetation, or debris from the designated deck area. Ensure the ground is level and free of obstructions.
- Mark the perimeter: Using stakes and string, accurately mark the perimeter of the deck, ensuring square corners using a speed square or other measuring tools. Double-check your measurements to avoid errors.
- Check for utilities: Before digging, contact your local utility companies to locate and mark underground utilities such as gas lines, water pipes, and electrical cables. This prevents accidental damage and ensures safety.
- Level the ground: Ensure the ground is level within a reasonable tolerance. This might involve excavating high spots or filling low areas with compacted gravel or other suitable base material.
Deck Installation Plan
A well-defined plan ensures a smooth and efficient installation. Consider the deck’s size, shape, and desired features before starting.
Imagine a 12ft x 16ft rectangular deck. A simple diagram would show a rectangular Artikel with joists running parallel to the 16ft side, spaced 16 inches apart. The joist supports would be marked at regular intervals, and the placement of posts or beams would be indicated. A second diagram might show the layout of the decking boards, indicating the direction of the boards and the positioning of any cuts needed to fit around obstacles or to create a pattern. A third diagram could detail the fastening of the boards to the joists.
Ensuring a Level and Stable Foundation
A level and stable foundation is the bedrock of a durable and safe deck. This involves careful consideration of the ground conditions and the chosen support structure.
A properly prepared foundation is crucial for preventing sagging, squeaking, and potential structural failure.
- Use concrete footings: For decks requiring significant support, concrete footings provide an exceptionally stable base. Footings should be properly sized and reinforced for the expected load.
- Properly spaced joists: The spacing of joists is crucial for distributing the load evenly across the deck’s surface. Using pressure-treated lumber for joists ensures durability and resistance to rot and insects.
- Leveling the joists: Ensure that the joists are perfectly level using shims and a level. This prevents unevenness in the finished deck.
- Fasteners: Use appropriate fasteners to secure the joists to the support structure. Over-tightening can damage the wood, while under-tightening can compromise the structure’s integrity.
Deck Framing and Joist Installation
Building a sturdy and long-lasting Fiberon deck starts with a solid foundation—your framing and joists. Proper installation ensures the structural integrity of your deck and prevents future problems like sagging or uneven surfaces. This section will guide you through the process, highlighting key considerations for success.
The heart of your deck’s structural support lies in the framing and joist system. This system distributes the weight of the decking and any loads placed on it evenly across the underlying support structure, typically concrete piers or footings. Correct spacing, material selection, and fastening techniques are crucial for a safe and durable deck.
Joist Spacing and Support
Proper joist spacing is essential to prevent sagging and ensure the deck’s longevity. Fiberon recommends following local building codes and consulting with a structural engineer if needed, especially for larger or more complex deck designs. Generally, joists are spaced 12 to 16 inches apart, depending on the joist size and the anticipated load. Heavier loads, like hot tubs or large gatherings, require closer spacing or larger joists. For example, a 2×10 joist might be suitable for a smaller deck with light traffic, while 2×12 joists would be necessary for a larger deck or one that will bear significant weight. Remember to always check your local building codes for specific requirements regarding joist spacing and sizing.
Installing Joist Hangers
Joist hangers provide a secure connection between the joists and the deck beams or rim joists. Using these hangers is crucial for proper load distribution and prevents the joists from pulling away from the beams. Proper installation involves several steps:
First, position the joist hanger on the beam according to the manufacturer’s instructions. Ensure that the hanger is properly aligned and sits flush against the beam. Next, carefully place the joist into the hanger, making sure it sits snugly within the hanger’s cradle. Finally, fasten the hanger to the beam using the appropriate nails or screws specified by the manufacturer. It’s crucial to drive the fasteners straight and firmly to avoid splitting the wood and ensure a strong connection. Under-fastening is a common mistake that can lead to structural weakness. Always use galvanized fasteners to resist rust and corrosion.
Common Framing and Joist Installation Mistakes, Fiberon decking installation
Several common mistakes can compromise the structural integrity of your deck. These include:
- Improper joist spacing: Spacing joists too far apart can lead to significant sagging over time.
- Using undersized joists: Not selecting joists appropriate for the deck’s size and anticipated load can result in structural failure.
- Incorrect joist hanger installation: Improperly installed joist hangers fail to provide adequate support, leading to instability.
- Insufficient fastening: Using too few fasteners or driving them incorrectly weakens the connection points.
- Ignoring local building codes: Failure to comply with local building codes can lead to safety hazards and legal issues.
Avoiding these mistakes requires careful planning, attention to detail, and adherence to best practices and local building codes. Always double-check your measurements and ensure proper alignment before fastening anything permanently.
Fastening Techniques for Optimal Support
The success of your deck framing hinges on proper fastening techniques. Using the correct fasteners and driving them correctly is crucial. For example, using galvanized nails or screws designed for exterior use is essential to resist rust and corrosion. The number and placement of fasteners should always adhere to the manufacturer’s recommendations and local building codes. Over-driving fasteners can split the wood, while under-driving them compromises the connection’s strength. Pre-drilling pilot holes for screws can prevent splitting, especially in harder wood.
Installing Fiberon Decking Boards

Source: spahnandrose.com
Now that your deck frame is ready, it’s time to install the Fiberon decking boards, the star of the show! This process involves careful cutting, precise spacing, and secure fastening to create a beautiful and durable deck. Remember to always consult Fiberon’s official installation guide for the most up-to-date and specific instructions for your chosen decking product.
Installing Fiberon decking boards is a straightforward process, but attention to detail will ensure a professional-looking and long-lasting result. Consistent spacing and proper fastening are crucial for preventing issues like cupping, warping, and squeaking. We’ll cover the essential techniques to achieve a flawless finish.
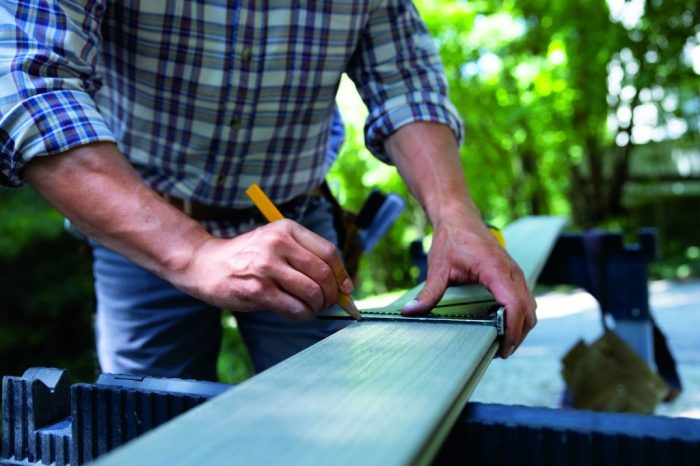
Cutting Fiberon Decking Boards
Cutting Fiberon decking requires the right tools for a clean cut. A circular saw with a fine-tooth blade designed for composite materials is ideal. Always make sure the blade is sharp to avoid chipping or splintering. For more intricate cuts, a jigsaw works well. Measure twice, cut once—this is especially important with composite decking as it can be more challenging to make adjustments after the cut. Mark your cutting line clearly with a pencil. Support the board firmly during cutting to prevent it from moving or vibrating, which can lead to an uneven cut. After cutting, lightly sand any rough edges to create a smooth finish.
Spacing and Alignment of Decking Boards
Maintaining consistent spacing between Fiberon decking boards is vital for proper drainage and to prevent uneven settling. Fiberon recommends a consistent gap of 1/8″ to 3/16″ between boards. Use spacers of the correct size to ensure uniform spacing throughout the installation. Begin installation at the most visible part of the deck to establish a straight starting line. Use a chalk line to create a straight reference point for the first few boards, ensuring a perfectly aligned deck. Regularly check alignment using a level and adjust as needed to maintain straightness across the entire deck. Any inconsistencies will become increasingly noticeable as you proceed.
Fastening Fiberon Decking Boards
Securely fastening the decking boards is essential for longevity and stability. Fiberon recommends using their specified fasteners, which are designed to work with their composite materials. Pre-drilling pilot holes is recommended to prevent splitting, especially when using hidden fasteners. The spacing of fasteners depends on the length of the boards and the manufacturer’s recommendations, typically every 12-16 inches. Drive the fasteners straight to avoid damaging the boards or causing them to become loose. Always check the manufacturer’s instructions for specific recommendations on fastener type, spacing, and driving depth. Using a cordless drill with a driver bit makes this process quick and efficient.
Achieving a Professional Finish
A professional finish is all about attention to detail and consistency. By using consistent spacing, ensuring straight alignment, and driving fasteners correctly, you’ll achieve a flawless look. Remember to regularly check your work with a level and square to ensure everything remains straight and square. Take your time, and don’t rush the process. A slow and deliberate approach will yield the best results. Cleaning up any sawdust or debris as you go will leave your deck looking pristine once completed. The final result will be a beautiful and durable deck that you can enjoy for years to come.
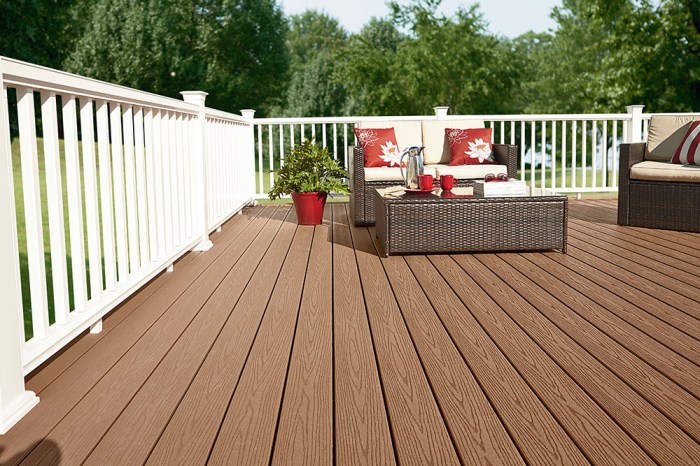
Finishing Touches and Accessories
Source: abmartin.net
Now that your Fiberon decking is installed, it’s time to add the finishing touches that will truly make your deck shine. This involves installing accessories, protecting your investment with sealant, and enhancing the overall aesthetic appeal. Proper installation of these elements is key to ensuring the longevity and beauty of your new deck.
Adding accessories like railings, stairs, and lighting not only improves the functionality and safety of your deck but also significantly contributes to its overall design and visual impact. Sealing your deck protects it from the elements, extending its lifespan and maintaining its beautiful appearance. Finally, carefully considered enhancements can transform your deck into a true outdoor oasis.
Railing Installation
Fiberon offers a variety of railing systems designed to complement their decking. Installation typically involves attaching railing posts to the deck framing, then installing the rails and balusters. Precise measurements and careful alignment are crucial for a professional-looking finish. Consult the specific installation instructions provided with your chosen railing system for detailed steps and recommended hardware. Remember to check local building codes regarding railing height and spacing requirements. For example, a common requirement is a minimum height of 36 inches for railings around decks higher than 30 inches.
Stair Installation
Building stairs requires careful planning and precise execution. Fiberon provides detailed instructions for constructing stairs using their decking boards and specialized stair components. This often involves creating a sturdy stringer system, accurately cutting the decking boards to fit the stair treads and risers, and ensuring proper support and stability. Remember to consider factors like rise and run measurements for comfortable and safe stair usage. A common guideline is a rise of 7 inches and a run of 11 inches, though this can be adjusted based on local codes and personal preferences. Always double-check your measurements and cuts before committing to the final installation.
Lighting Installation
Deck lighting adds both ambiance and safety. Fiberon compatible lighting systems can be integrated into the deck framing or attached directly to the decking boards. Electrical wiring should be done by a qualified electrician to ensure safety and compliance with local building codes. Consider the placement of lighting to highlight key features of your deck and create the desired atmosphere. For instance, low-voltage LED lighting embedded along the railing can provide soft illumination, while strategically placed spotlights can accentuate plants or other decorative elements.
Sealing and Protecting the Deck
While Fiberon decking is low-maintenance, applying a sealant can further enhance its durability and protect it from UV degradation and staining. Choose a sealant specifically designed for composite decking materials. Follow the manufacturer’s instructions carefully, paying attention to application methods and drying times. A properly sealed deck will maintain its rich color and resist fading for a longer period. Consider applying the sealant annually or as needed, especially in harsh climates. Using a high-quality sealant, such as those specifically formulated for composite decking, is crucial for maximizing the protection and lifespan of your investment.
Enhancing the Appearance
There are several ways to enhance the appearance of your Fiberon deck beyond the basic installation. Consider adding potted plants, outdoor furniture, and decorative accessories to create a personalized outdoor space. Outdoor rugs can add warmth and texture, while strategically placed lighting can create a welcoming atmosphere. The use of color-coordinated accessories, such as planters or cushions, can help tie the overall design together. For example, choosing furniture in colors that complement the deck’s color scheme can create a visually appealing and cohesive look.
Common Fiberon Decking Accessories and Installation Methods
Before starting any accessory installation, always refer to Fiberon’s official installation guides for specific instructions and recommendations. These guides often include diagrams and detailed steps for each accessory.
- Railings: Attach posts to deck framing using appropriate fasteners, then install rails and balusters according to manufacturer’s instructions. Ensure proper spacing and height compliance with local building codes.
- Stairs: Construct stringers, cut and install treads and risers, ensuring proper support and adherence to building codes for rise and run measurements.
- Lighting: Install lighting fixtures according to manufacturer’s instructions, ensuring proper electrical connections and compliance with local electrical codes. Work with a qualified electrician if needed.
- Post Caps: Simply place post caps onto the top of railing posts for a finished look. Ensure a snug fit.
- Baluster Spacers: These maintain consistent spacing between balusters, ensuring uniformity and safety. They are typically installed during baluster installation.
Troubleshooting Common Installation Issues
Even with careful planning and preparation, you might encounter some snags during your Fiberon decking installation. This section will address common problems and provide solutions to get you back on track to enjoying your beautiful new deck. Remember, patience and attention to detail are key to a successful installation.
Uneven Deck Surfaces
Uneven ground beneath your deck frame is a frequent culprit for problems later on. An uneven surface can lead to bowed decking boards and an overall unstable deck. Before installing the decking boards, ensure the joists are level. Use shims of varying thicknesses under the joists to correct any inconsistencies. A level or laser level will be your best friend here. Regularly check your work using these tools to ensure the surface remains level throughout the framing process. Significant discrepancies might require additional support beams or adjustments to the underlying ground. If the ground is significantly uneven, consider bringing in a professional to assess and address the foundation issues before proceeding with the deck.
Warped Decking Boards
Fiberon decking is designed to be durable, but extreme temperature fluctuations or improper storage can lead to warping. Before installation, acclimate the boards to the outdoor environment for several days. This allows the wood-plastic composite to adjust to the ambient temperature and humidity. During installation, ensure proper spacing between boards to allow for expansion and contraction. The manufacturer’s recommended spacing should be followed precisely. If you encounter a warped board, try gently bending it back into shape before installation. If this doesn’t work, consider replacing the board. Avoid forcing warped boards into place, as this will only worsen the problem.
Fastener Problems
Using the wrong fasteners or improper installation techniques can cause problems. Always use the recommended fasteners for Fiberon decking. Using too short or too long fasteners can lead to splitting boards or improper fastening. Ensure that you are driving the fasteners straight to avoid damage. Pre-drilling pilot holes is generally recommended to reduce the risk of splitting, especially with harder woods. If you encounter stripped screw holes, you may need to use wood filler to repair the damage before installing a new screw. Using a slightly larger diameter screw might also be a viable solution.
Difficult Cuts and Complex Deck Designs
Cutting Fiberon decking boards requires a sharp blade to prevent chipping or splintering. A circular saw with a fine-tooth blade is recommended. For intricate cuts or curves, a jigsaw is a better option. For complex designs, carefully plan your cuts, using accurate measurements and templates. Take your time and work meticulously. Always measure twice and cut once. If you’re uncomfortable making intricate cuts, it might be best to enlist the help of a professional. Remember, safety is paramount; always wear appropriate safety equipment, including eye protection and hearing protection.
Dealing with Difficult Terrain
Installing a deck on a slope requires extra planning. You might need to create a stepped deck or use adjustable posts to ensure level decking boards. Using a level throughout the process is crucial. Remember to consult local building codes for specific requirements on deck construction on slopes. Consider consulting with a professional if you’re unsure how to properly address the challenges posed by sloping terrain. Improperly addressing slopes can lead to structural instability and safety hazards.
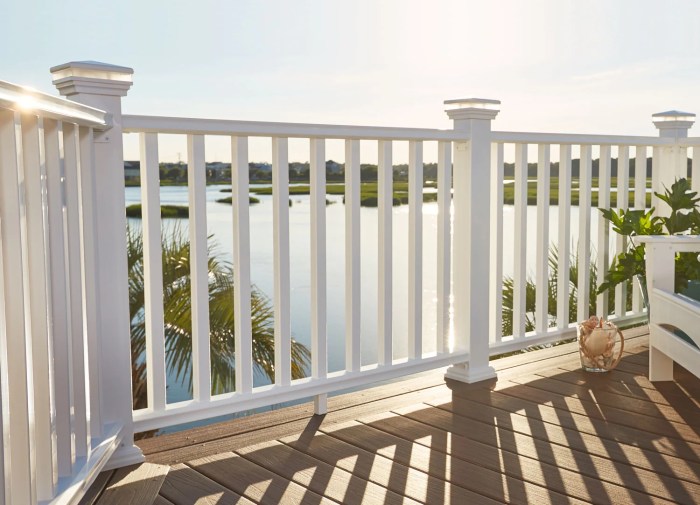
Safety Precautions During Installation: Fiberon Decking Installation
Source: spahnandrose.com
Installing a Fiberon deck is a rewarding project, but safety should always be your top priority. Taking precautions will protect you from injury and ensure a smooth installation process. Remember, even seemingly minor tasks can pose risks if proper safety measures aren’t followed.
Proper safety equipment is crucial for preventing accidents. This isn’t just about avoiding minor scrapes; serious injuries can occur if you’re not prepared. Using the right gear protects your body’s most vulnerable parts and helps you maintain focus on the task at hand.
Personal Protective Equipment (PPE)
Safe decking installation begins with the right personal protective equipment. Gloves protect your hands from splinters, cuts, and chemical irritants found in some cleaning products used during or after installation. Safety glasses or goggles shield your eyes from flying debris, sawdust, and chemical splashes. A dust mask or respirator is essential for preventing inhalation of wood dust and other airborne particles, particularly when using power tools. Hearing protection, such as earplugs or earmuffs, is crucial when operating loud power tools. For elevated work, a safety harness and appropriate fall protection system are necessary.
Power Tool Safety
Power tools are essential for efficient deck building, but they also present significant hazards. Always ensure the tools are in good working order, with blades and bits sharp and securely attached. Never operate a power tool if you’re tired or distracted. Maintain a firm grip and use the proper technique for each tool. Disconnect power tools before making adjustments or changing blades. Be aware of the tool’s kickback potential and maintain a safe distance from the cutting area. For example, when using a circular saw, always use a push stick to keep your hands clear of the blade.
Working at Heights
Working at heights significantly increases the risk of falls. Never work at a height without proper fall protection. This includes using a safety harness securely attached to a stable anchor point, such as a strong beam or a properly installed fall arrest system. Ensure that the ladder or scaffold is stable and positioned correctly before climbing. Always maintain three points of contact when climbing a ladder (two hands and one foot, or two feet and one hand). Avoid reaching excessively while working at height. If you need to reach a distant area, reposition yourself rather than overextending your reach.
Preventing Accidents
Maintaining a clean and organized work area significantly reduces the risk of accidents. Keep walkways clear of debris and tools. Proper lighting is also important, especially when working in low-light conditions. Before beginning any work, carefully plan the project, including the layout and sequence of tasks. Take breaks to avoid fatigue, which can lead to mistakes and accidents. If you are unsure about any aspect of the installation, consult the Fiberon installation guide or seek professional assistance. Never rush the process; safety should always be prioritized over speed.
Final Review
Building a Fiberon deck is a rewarding project that enhances your home’s value and creates a beautiful outdoor living space. By following this guide’s comprehensive steps and safety precautions, you’ll confidently navigate the installation process. Remember, proper planning and attention to detail are key to achieving a stunning, long-lasting deck. So, grab your tools, and let’s get started!
Comments are closed.