How to Patch Small Holes in Vinyl Siding
How to patch a small hole in vinyl siding? It’s a common homeowner problem, easily solved with the right know-how. Whether a rogue baseball or a bit of weathering did the damage, fixing those tiny blemishes in your vinyl siding is simpler than you think. This guide walks you through assessing the damage, selecting the right materials, and applying the patch perfectly, leaving your siding looking as good as new.
We’ll cover everything from identifying the cause of the hole to choosing the best patching method, and even how to match the paint for a flawless finish. We’ll also tackle some advanced techniques for trickier situations, like patching near corners or dealing with larger holes. Get ready to become a vinyl siding repair expert!
Assessing the Damage
Before you grab your patching materials, take a moment to carefully assess the hole in your vinyl siding. Understanding the size, location, and cause of the damage will help you choose the right repair method and ensure a lasting fix. A thorough inspection will prevent bigger problems down the road.
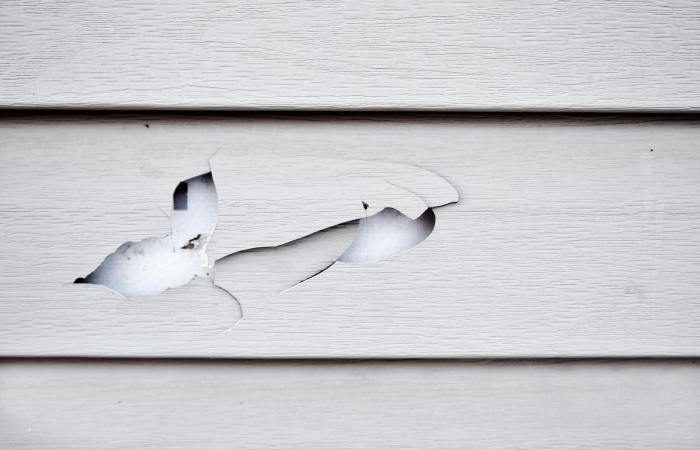
Small holes in vinyl siding typically appear as clean punctures, sometimes with slightly frayed edges. They can range in size from a tiny pinprick to a hole the size of a dime, or even larger depending on the impact. They’re often caused by impacts from small objects, like stones kicked up by lawnmowers, or by accidental damage from tools. Weathering, while less common for small holes, can also contribute over time, especially in areas with harsh conditions.
Hole Size and Location
To accurately assess the damage, start by carefully examining the hole itself. Use a ruler or measuring tape to determine its precise dimensions. Note the length and width of the hole. Then, observe its location on the siding panel. Is it near an edge, corner, or in the center? Knowing the location will help determine if the repair needs to be more extensive or if a simple patch will suffice. For example, a hole near an edge might require more careful attention to avoid weakening the panel.
Necessary Assessment Tools
A simple inspection usually only requires a few basic tools. A flexible ruler or tape measure will provide accurate measurements of the hole’s size. A flashlight can help illuminate the hole and surrounding area, particularly in shaded areas or during low-light conditions. Sometimes, a small, stiff brush might be useful to gently remove any loose debris from the hole before assessing its true size and condition.
Determining the Cause of the Hole
Identifying the cause of the hole can help prevent future damage. If the hole is relatively clean and small, it’s likely caused by a small impact, like a pebble or a stray tool. Look for other similar damage nearby; multiple small holes in a line might suggest something like a lawnmower strike. If the hole shows signs of significant weathering or degradation around the edges, this could indicate an issue with the siding material itself or exposure to extreme weather conditions. Examining the surrounding area for clues, like impact marks or signs of deterioration, is crucial in determining the root cause.
Material Selection and Preparation

Source: whatisvinyl.com
Patching a hole in your vinyl siding requires choosing the right materials for a durable and aesthetically pleasing repair. The key is to select a material that closely matches the color and texture of your existing siding, ensuring a seamless blend. Improper material selection can lead to a noticeable patch and potentially compromise the siding’s weather resistance.
Choosing the right patching material depends on the size and location of the hole. For small holes, a vinyl siding patch or a high-quality caulk designed for exterior use is often sufficient. Larger holes might require more substantial repairs, potentially involving cutting and replacing sections of the siding.
Patching Material Comparison
Vinyl siding patches are specifically designed to match the color and texture of various siding types. They offer a durable, long-lasting solution that’s less likely to crack or fade compared to other patching materials. However, they require precise cutting and fitting to ensure a seamless repair. Exterior-grade caulks, while offering flexibility and ease of application, may be less durable in the long run and might be more prone to cracking or discoloration over time, especially in harsh weather conditions. Choosing the right one depends on the size of the hole and your desired level of permanence. For very small holes, a color-matched caulk might be ideal; for larger holes, a vinyl patch is usually necessary.
Materials Needed
A successful repair hinges on having the right tools and materials at hand. Here’s a list to help you get started:
- Vinyl siding patch (if needed): Choose a patch that closely matches the color and texture of your existing siding. Size will depend on the hole’s dimensions, ensuring sufficient overlap.
- Exterior-grade caulk (if needed): Opt for a high-quality, paintable caulk specifically formulated for exterior use and vinyl siding. Choose a color that closely matches your siding. A tube of 10.1 oz should suffice for most small repairs.
- Utility knife: A sharp blade is essential for precise cutting of the vinyl patch, if used.
- Caulk gun: This tool facilitates even and controlled application of caulk.
- Putty knife or scraper: Useful for cleaning the area around the hole and smoothing out the caulk.
- Cleaning supplies: Include a stiff brush, soapy water, and a clean rag.
- Measuring tape: To accurately measure the hole and cut the patch to the appropriate size.
- Painter’s tape (optional): Helps to create clean edges when applying caulk.
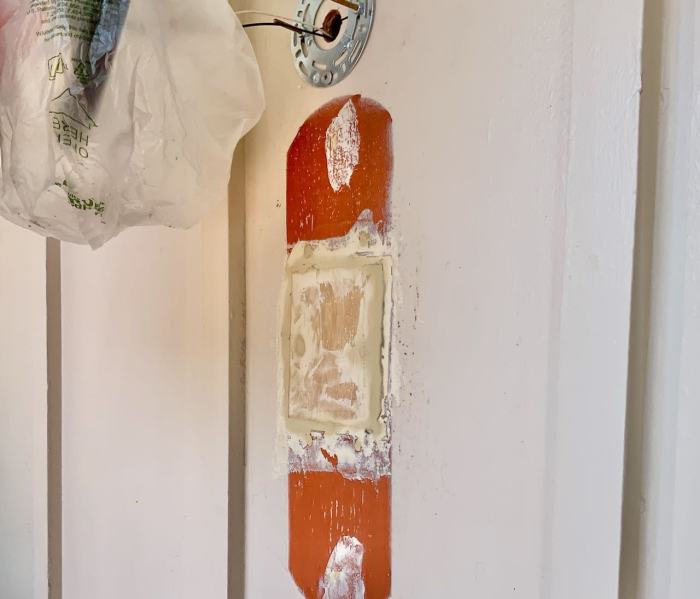
Area Cleaning and Preparation
Before applying any patching material, thorough cleaning is crucial. Use a stiff brush to remove any loose debris, dirt, or cobwebs from the damaged area and the surrounding siding. Then, wash the area with soapy water, rinsing thoroughly and allowing it to dry completely. This ensures proper adhesion of the patching material. Any remaining loose paint or flaking material should be carefully scraped away with a putty knife. A clean, dry surface is paramount for a successful repair.
Mixing Patching Compounds (If Necessary)
While vinyl patches don’t require mixing, some caulks might need it depending on the product. Always follow the manufacturer’s instructions carefully. Typically, this involves cutting the sealant’s tip and using a caulk gun to apply it directly. However, some two-part epoxy fillers might require mixing the two components according to specific ratios indicated on the product’s packaging to achieve the desired consistency and strength. Improper mixing can compromise the filler’s performance, so precise adherence to the instructions is vital. For instance, a common error is not mixing thoroughly, which leads to uneven curing and reduced adhesion.
Patching Techniques
Source: southhousedesigns.com
Repairing a small hole in your vinyl siding can be accomplished using a couple of different methods, each with its own set of advantages and disadvantages. The best approach depends on the size and location of the damage, as well as your comfort level with DIY repairs. We’ll explore two common techniques: using caulk and using pre-made vinyl siding repair patches.
Applying Vinyl Siding Patch Using Caulk
Caulk is a quick and relatively inexpensive option for patching very small holes or cracks. It’s best suited for minor imperfections where a seamless, invisible repair isn’t crucial. The key to success is choosing a high-quality, paintable caulk that closely matches the color of your siding.
- Clean the damaged area thoroughly. Remove any loose debris or dirt with a brush or scraper.
- Apply a thin, even bead of caulk to the hole, ensuring complete coverage. Use a caulking gun for better control.
- Smooth the caulk with a damp finger or a putty knife, creating a smooth, flush surface with the surrounding siding.
- Allow the caulk to dry completely according to the manufacturer’s instructions. This usually takes several hours.
- Once dry, lightly sand the patched area to ensure a smooth finish before painting.
Using Vinyl Siding Repair Patches, How to patch a small hole in vinyl siding
Pre-made vinyl siding repair patches offer a more durable and often more aesthetically pleasing solution, especially for larger holes or more noticeable damage. These patches are designed to blend seamlessly with existing siding.
- Prepare the area around the hole by cleaning it and removing any loose or damaged siding.
- Select a patch that closely matches the size and color of your siding. Many repair patches are available in a range of standard colors.
- Carefully apply construction adhesive to the back of the patch, following the manufacturer’s instructions.
- Firmly press the patch onto the hole, ensuring complete contact. Use a putty knife or similar tool to ensure a tight seal.
- Allow the adhesive to cure completely. This may take several hours or overnight, depending on the adhesive used.
- Once cured, caulk any gaps between the patch and the surrounding siding to further ensure a watertight seal.
Caulk Versus Patching Materials: A Comparison
While both caulk and pre-made patches can effectively repair small holes, their effectiveness varies depending on the severity of the damage. Caulk is best for tiny cracks or pinholes, offering a quick and easy fix. Patches are superior for larger holes or more significant damage, providing a more robust and visually appealing repair.
Painting the Patched Area
Proper painting is essential to seamlessly blend the repair with the existing siding. Choose a high-quality exterior paint that matches your siding’s color.
- Clean the patched area thoroughly with soap and water to remove any dirt or debris.
- Apply a thin, even coat of primer to the patched area. Primer helps the paint adhere better and ensures a uniform finish.
- Allow the primer to dry completely.
- Apply one or two thin coats of exterior paint, allowing each coat to dry completely before applying the next.
- For best results, use a small brush or roller to ensure even coverage and avoid brush strokes.
Patching Method Comparison
| Method | Materials | Advantages | Disadvantages |
|---|---|---|---|
| Caulk | Paintable caulk, caulking gun, putty knife | Quick, inexpensive, easy to apply for small holes | Less durable, may not be suitable for larger holes, less aesthetically pleasing |
| Vinyl Siding Repair Patch | Vinyl siding patch, construction adhesive, putty knife, caulk (optional) | More durable, better for larger holes, more aesthetically pleasing, provides a more watertight seal | More expensive, requires more time and effort |
Advanced Techniques and Considerations
Patching vinyl siding successfully often involves more than just slapping a patch over a hole. Understanding different siding types and anticipating potential problems is key to a long-lasting repair. This section delves into more complex scenarios and offers preventative measures to keep your siding looking its best.
Patching techniques vary depending on the type of vinyl siding you have. For instance, vertical siding requires a slightly different approach than horizontal siding, especially when dealing with larger holes. Similarly, the thickness and profile of the siding will influence your material choices and the best patching method.
Patching Different Vinyl Siding Types
The basic patching techniques remain similar regardless of siding type, but the precise application might differ. With vertical siding, ensuring the patch aligns perfectly with the vertical lines is crucial for a seamless finish. Horizontal siding patching focuses on maintaining a consistent horizontal line. The most important aspect is choosing a patch that closely matches the existing siding’s color, texture, and profile. Using a high-quality caulking to seal the edges is also essential in both cases, preventing water infiltration.
Handling Larger Holes or Significant Damage
Larger holes or significant damage, such as those caused by impacts or severe weather, may require more involved repairs. Simple patches might not suffice. In such cases, you may need to replace a section of siding entirely. This involves carefully removing the damaged section, measuring the replacement piece, and securing it with appropriate fasteners. It’s important to follow the manufacturer’s instructions for installation and use a matching piece to maintain the siding’s aesthetic integrity. For very large areas of damage, consulting a professional siding contractor is recommended.
Challenges and Troubleshooting Tips
One common challenge is achieving a perfect color match. Even with carefully selected patches, slight variations might be visible, especially in direct sunlight. Using a high-quality exterior-grade paint to touch up the area can help blend the patch seamlessly. Another challenge is preventing water infiltration. Always ensure a proper seal around the patch using high-quality caulk. If you notice any signs of water leakage after patching, immediately investigate and re-seal the area to prevent further damage. Proper caulking and careful patch installation are crucial to preventing future problems.
Preventative Measures
Regular inspection of your vinyl siding is vital. Look for any signs of damage, such as cracks, holes, or loose pieces. Address minor issues promptly to prevent them from escalating. Properly maintaining the surrounding landscaping can also help prevent damage. Keep tree branches and other objects away from your siding to avoid accidental impacts. During storms, consider protecting vulnerable areas with protective coverings. These simple measures can go a long way in maintaining the integrity and appearance of your siding.
Patching Near Corners or Edges
Patching near corners or edges requires extra care and precision. You’ll need to ensure the patch fits snugly and aligns perfectly with the existing siding’s profile and lines. A sharp utility knife and careful measuring are crucial for creating a clean cut and ensuring a tight fit. Proper caulking around the edges is even more important in these areas to prevent water from seeping into the seams and causing further damage. Consider using a flexible caulk designed for exterior use to accommodate movement and expansion of the siding. A well-executed patch near an edge will be virtually invisible.
Visual Aids

Source: cladsiding.com
Understanding what a successful and unsuccessful vinyl siding repair looks like is crucial for achieving a professional finish. Visualizing the ideal outcome and common pitfalls will help you assess your work and make necessary adjustments. The following descriptions will guide you in evaluating your repair.
A properly patched hole in vinyl siding should be virtually invisible. The patch should perfectly match the surrounding siding in both color and texture. There should be no noticeable seams, gaps, or discoloration. The repaired area should blend seamlessly with the existing siding, appearing as if the hole never existed. Even from close range, the repair should be undetectable. Imagine a perfectly smooth surface, with the repaired section indistinguishable from the original. The color should be an exact match, avoiding any shading or highlighting of the repaired area.
Appearance of a Properly Patched Hole
A successful repair exhibits flawless color matching. The patched area integrates seamlessly with the surrounding siding, showing no visible lines, bumps, or inconsistencies in texture. The repaired section appears as a natural continuation of the original siding panel. Lighting should reflect evenly across the entire surface, with no evidence of a repair. The color should not only be a close match but should also account for the subtle variations in shading and tone that occur naturally across a large expanse of vinyl siding due to sun exposure. A high-quality repair will mimic this natural variation.
Appearance of an Improperly Patched Hole
Conversely, a poorly executed repair will be immediately obvious. Common flaws include a noticeable color mismatch, creating a stark contrast between the patch and the surrounding siding. The patch may appear lighter or darker, or have a different undertone. Seams or gaps might be visible around the patch, allowing moisture to penetrate. The texture of the patch might differ from the surrounding siding, leading to a bumpy or uneven surface. The repaired area might also be sunken or raised compared to the rest of the siding. In some cases, the patch may even crack or peel over time, completely negating the repair. Imagine a visible patch, with a different shade of color, a noticeable seam, and possibly even a slightly uneven texture. This is a prime example of an unsuccessful repair.
Choosing the Right Paint Color
Achieving a seamless color match is critical for a successful repair. Start by carefully examining the surrounding siding. Note any subtle variations in color due to sun exposure or age. The siding may not be a uniform color across its entire surface. Consider the orientation of the affected area relative to the sun. Areas exposed to more direct sunlight may appear slightly faded compared to those in shade. Take a small sample of the siding, away from the damaged area, to your local paint store. Many paint stores offer color matching services. They can analyze the sample and create a custom paint mix that precisely matches the existing siding, taking into account any existing variations. If a precise match is unattainable, select a color that blends seamlessly with the surrounding area rather than a stark contrast. Remember, a slightly off shade is better than a completely mismatched color that draws attention to the repair.
Wrap-Up: How To Patch Small Hole In Vinyl Siding
Fixing small holes in your vinyl siding doesn’t have to be a daunting task. By following the steps outlined in this guide, you can easily restore your home’s exterior to its former glory. Remember to carefully assess the damage, choose the appropriate patching material, and take your time to ensure a seamless repair. With a little patience and the right techniques, you can enjoy a beautiful, damage-free exterior for years to come. So grab your tools, and get patching!
Comments are closed.